When you create an offering for pre-recorded courses, you are doing it with the intent of uploading a course using recorded audio, videos, and documents.
You can use this offering to offer your users short or long online video courses, PDFs, e-books, tutorials, guide documents, or a blend of one or more things. You can also add assessments for your users to test their progress.
Here’s how you can create and publish Courses on Exly:
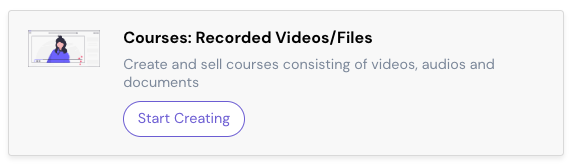
Step 1: From the Create A New Offering page, go to the Courses: Recorded Videos/Files card and click on Start Creating. Fill in the details in the Title and Price for the course. Now, click on Next.


| By checking in the 'Enable DRM' checkbox, you allow your content to be protected against piracy by the addition of watermarks in your images, videos, PDFs, etc. |
Step 2: You'll automatically be redirected to a new page wherein you will have to fill out more details about the offering like the course title and course structure.
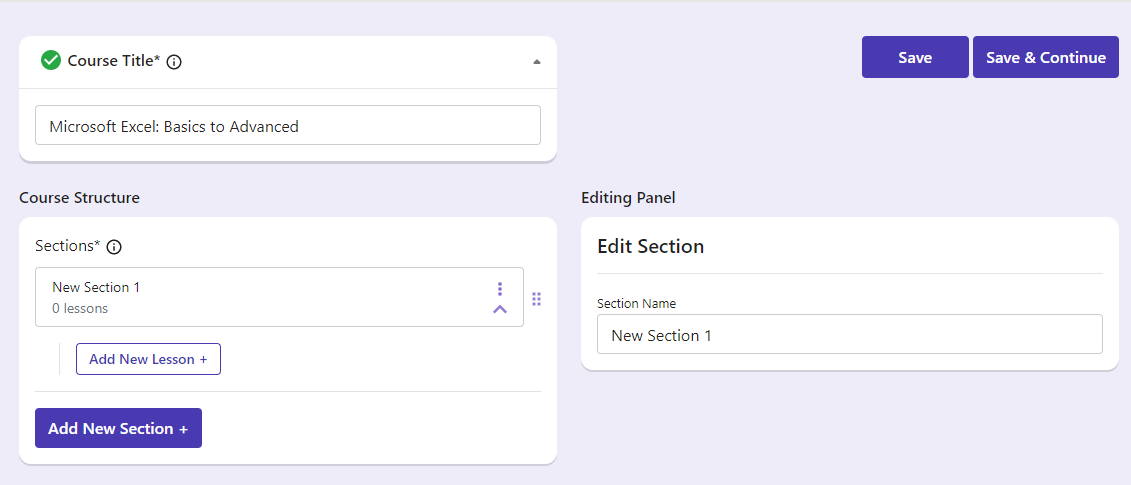
You'll also see an Editing Panel where you can view, edit and add all your content.
Let's now walk you through everything on this page in detail:
- You have the option to edit the Course Title you previously set.
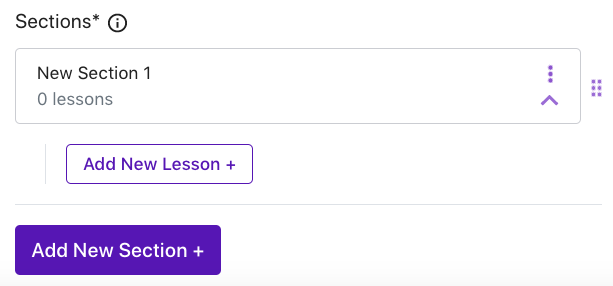
- Under the Course Structure section, click on Add New Section every time you wish to add a new section or a new lesson.
Step 3: Add and edit details in each section and lesson in the Editing Panel that appears on the right side of the page.
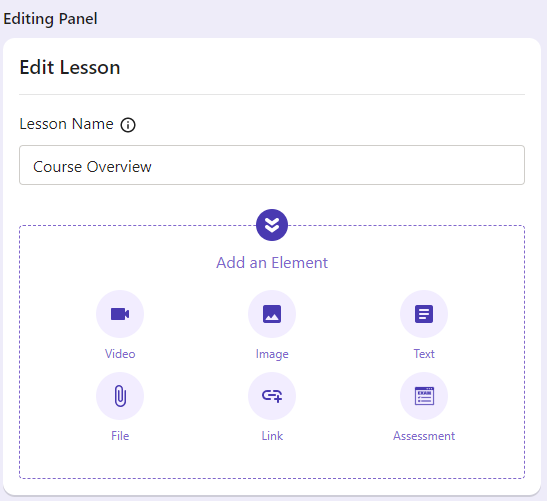
You can add a variety of elements like videos, images, text, files, links, and assessments to each lesson. |
Here’s a step-by-step guide on how to add each element to any lesson:
Video:
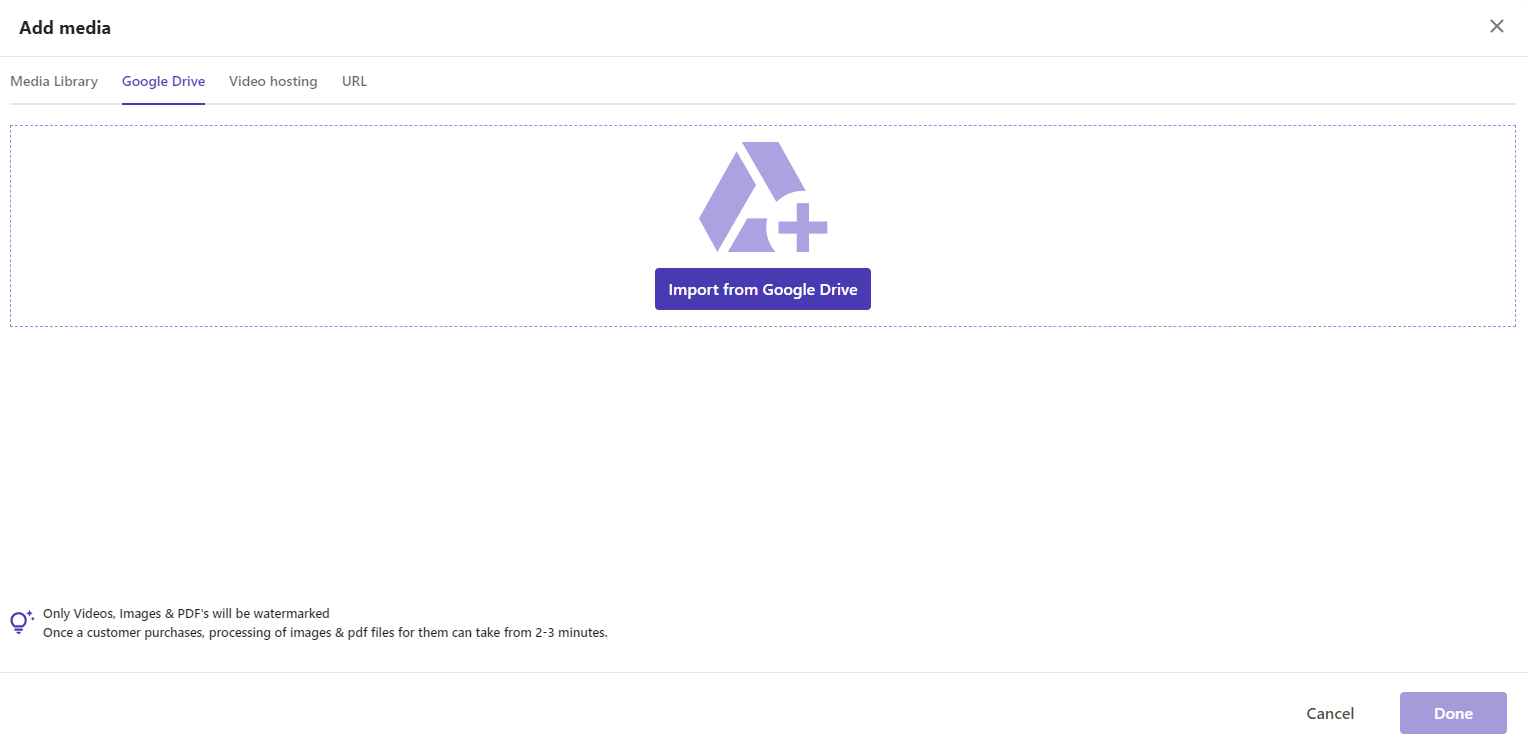
- Click on Video and a new window will pop up.
- To add a video, you can either upload one from your device, import it from your Google Drive, paste a URL, or use existing videos that you may have uploaded to your Media Library in the past.
After uploading, select the video you want to add by clicking on Add Selected.
- You can also edit the video title by clicking on the pencil icon.
Ensure that the length of the Title is between 3-100 characters. |
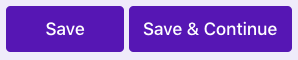
- Once you have added the details and links, click on Save or Save and Continue.

Image:
- Click on Image and a new window will pop up. 
- To add an image, you can either upload one from your device, import it from your Google Drive, paste a URL, or use existing images that you may have uploaded to your Media Library in the past.
- After uploading, select the video you want to add by clicking on Add Selected.
- Just like the video, you can also edit the video title by clicking on the pencil icon.
- Once you have added the details and links, click on Save or Save and Continue.
Text:
- Click on Text and a new window will pop up. 
- You can add the text in the text box and format it as per your requirement.
- Once you have added the details and links, click on Add Text.
File:
- Click on File and a new window will pop up.
- This is a place for you to add any kind of supplementary media — images, PDFs, templates in word doc or Excel sheet, an MP3 file, etc. To add something here, you can either upload it from your device, import it from your Google Drive, paste a URL, or use existing media that you may have uploaded to your Media Library in the past.
- Give all your files appropriate titles.
- Once you have added the details and links, click on Add Selected.
Link:
- Click on Link and a new window will pop up.
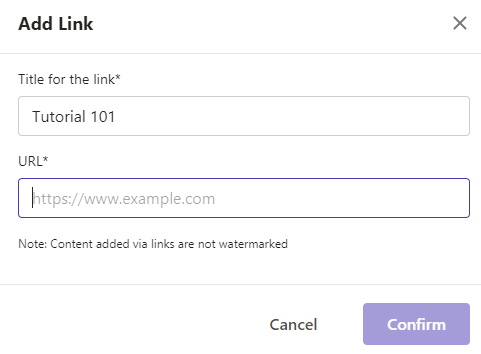
- Add an appropriate Title for your link.
- Add the link in the URL field.
- Once you have added the details and links, click on Confirm.
Assessment:
- Click on Assessment and a new window will pop up.
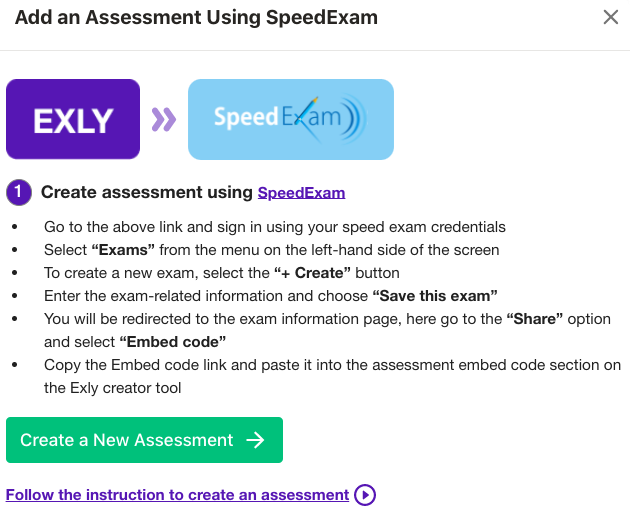
| You can add an assessment for your pre-recorded courses using SpeedExam by following the instructions mentioned in the image above. |
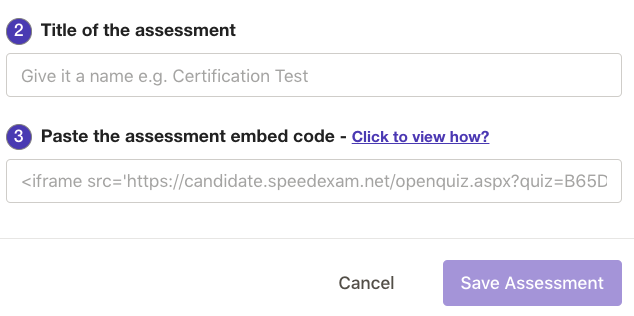
- Add an appropriate Title for the assessment field. The title should be self-explanatory.
- Paste the Assessment Embed Code in the provided field.
- Once you have added the details and links, click on Save Assessment.
Step 4: Once you have added all the lesson details along with the elements of your choice, click on Save or Save & Next.
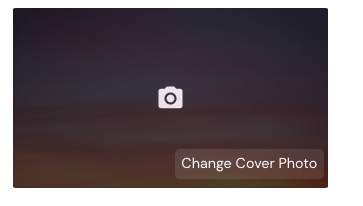
Step 5: You'll be redirected to the Course Details page where you have the option to add a cover photo for the offering, a brief course description, and additional instructions.

- A default cover photo is set for every offering you create, but if you wish to personalize the offering and change the default photo, you can do so by clicking on the Change Cover Photo option. You may upload an image from your device or search for a stock image.
- Although adding a course description and additional instructions for the offering is optional, it is always a good idea to give a brief description or highlight a couple of key points that you have focused on/covered in the course. This gives the enrollees an idea of what they are signing up for and thus be better prepared for the same. In it, you can also include the prerequisites for undertaking this course.
Step 6: It's now time to enable Watermarking for your digital products. Simply check this box to do so. (Please note that this is an optional step.)


Once you have added all details, click on Next.

Step 7: You'll now be redirected to the Pricing Page. Here, fill in more details — the price of the offering, who will bear the booking fees, course validity, etc.
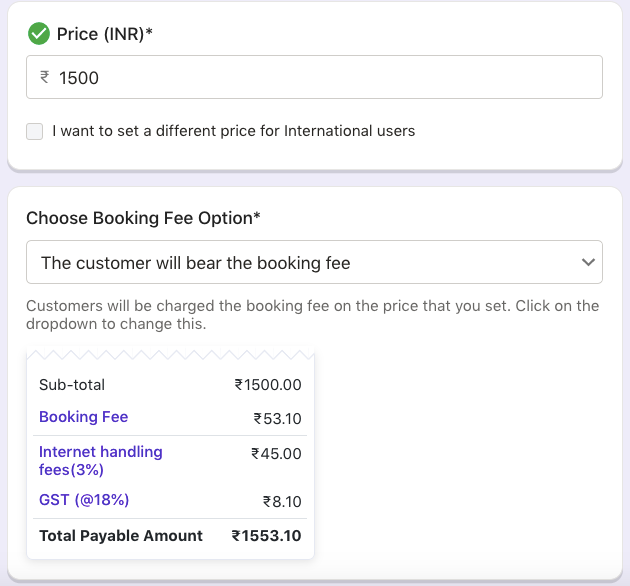
The price that you added for the offering on the first page will automatically appear in the Price field. However, you can always edit it. Make sure you add the pricing details in INR (Indian Rupee) only.
If you are willing to offer the product or service (or offering) to international users as well, then you can simply select the checkbox under the pricing field. When you do that, make sure to add the pricing in USD (United States Dollar).
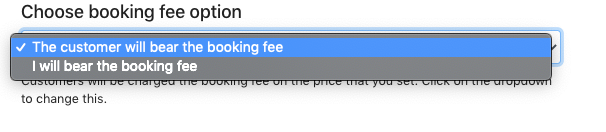
Each time an offering is bought on Exly, there’s a booking fee that gets added to the price. However, you have the option to choose who will bear that booking fee - you (the creator) or the end-user. You can choose the preferred option from the drop-down menu.


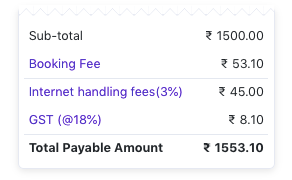
The breakup of the sub-total of fees will now be auto-generated.
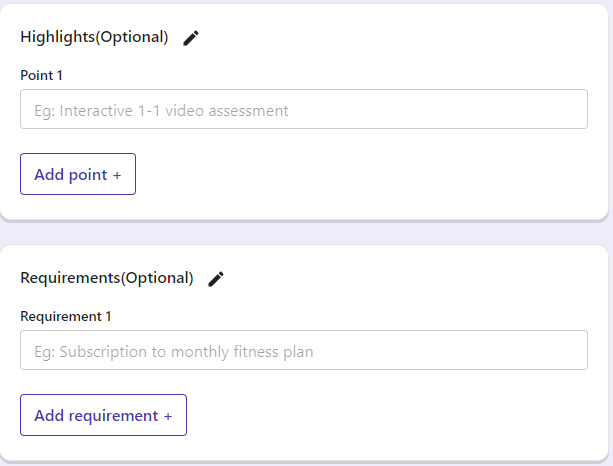
Step 8: Mention highlights of the course and requirements if any.
Step 9: You can decide whether you want the end-users to have access to all the sections of the course from the get-go or not by choosing from the below-mentioned options.
a. Choose Immediately if you want them to gain access to each section as soon as they pay for the course.
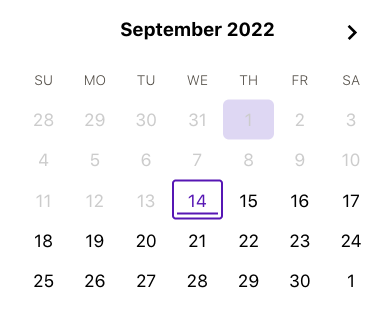
b. Choose On Specific Dates if you want them to unlock the sections on specific dates.
You can also add a specific date of unlocking for each section.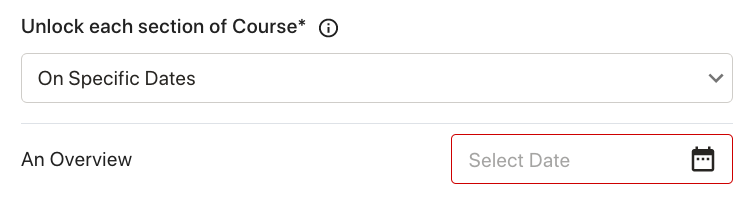
c. Choose After Certain Days of Starting Course if you want them to unlock the sections after a few days of starting the course. This can happen in case, say, the course is yet to be launched.
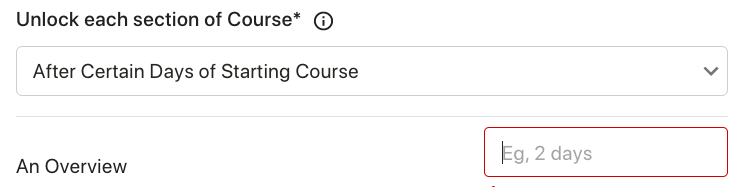
You can decide the specific number of days after which a section will be unlocked for the user.
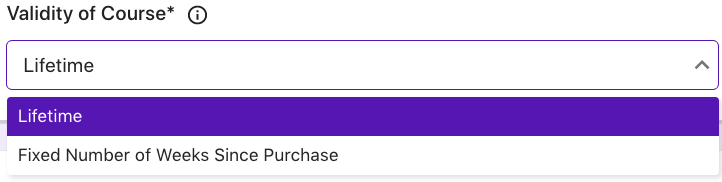
Step 10: Now choose the duration for which the course material will be available to the end-users. The course validity can be for a certain number of weeks and/or months or you can make the content indefinitely available to the end-users.
Step 11: You can give your users the option to interact with you through comments below each video module. They can use this to leave feedback or ask questions.
To enable this option, check the box below.
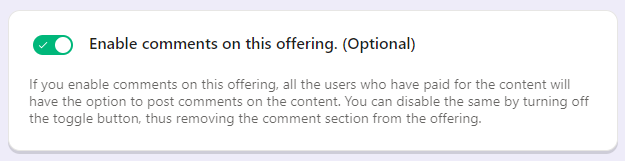
If you wish, you can always disable this option later.
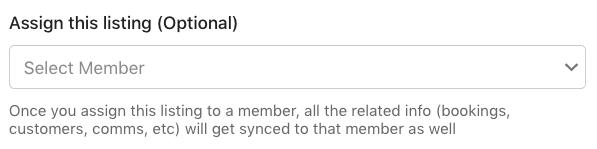
Step 12: Lastly, if you have team members added to your Add/Manage Staff tab, then you also have the option to assign this offering to any of them. The offering will, however, be assigned to you (the creator or owner) by default at first.
Once you have made all the additions, click on Next. You will be redirected to a new page where you can review all the details added.
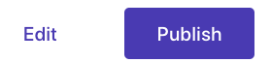
Step 13: After reviewing the details of the offering, you can either Publish the offering right away or click on Edit to make more changes.
Step 14: Once you publish your offering, a confirmation screen will appear along with the Invite Link.
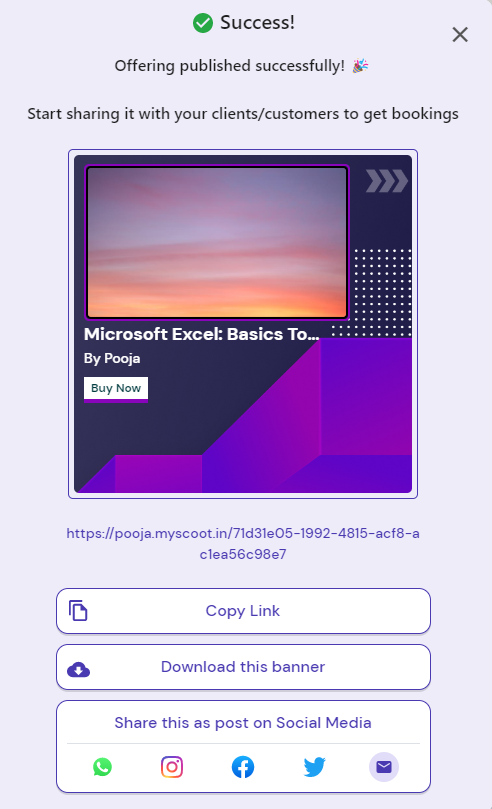
You can copy the invite link directly and share it with the clients manually, invite them via emails, or share the offering on your social media handles – Facebook, WhatsApp, IG, etc.
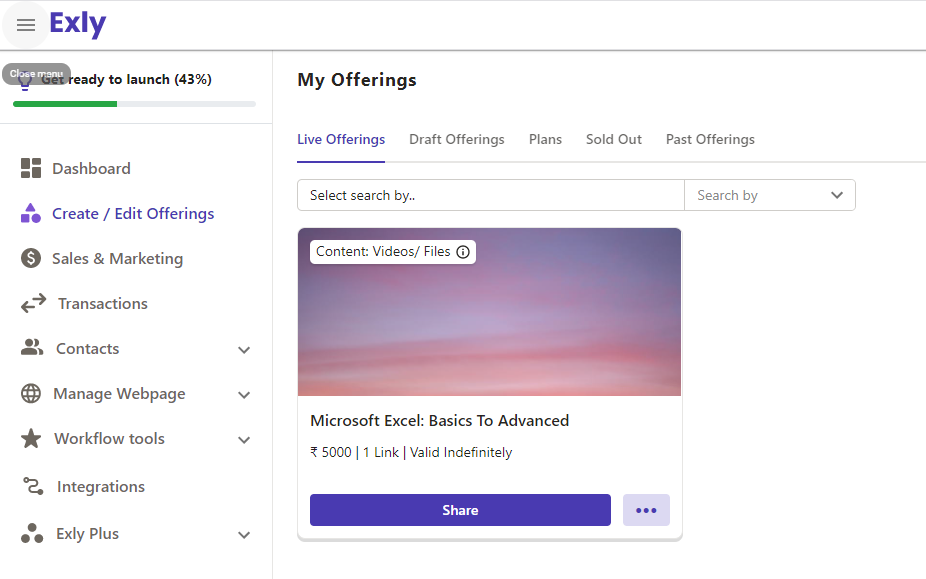
To view all your published or draft offerings: Click on the Create/Edit Offerings option. You can share (only live or published offerings), edit, or delete any offerings from this page. |