Exly's merchandise offering feature provides an exciting opportunity for creators to extend their brand and connect with their audience in a tangible way. By creating custom merchandise items, you can offer your followers a unique means of expressing their affiliation with your brand.
This feature not only opens up an additional revenue stream but also fosters a deeper sense of community and loyalty among your audience. Using the merchandise feature you can sell physical products to your customers.
Here’s a step-by-step guide to help you create Merchandise on Exly within 3 minutes:
Step 1: From the Create an Offering page, go to the Merchandise card and click on Start Creating.
Step 2: Fill in the details in the mandatory fields - add a title and price - for the merchandise, and then click on Next.
If you already have a similar offering, you can choose to duplicate that and make this process simpler.
Step 3: You will be redirected to a new page wherein you will have to fill out more details about the offering like the title and custom’s information.

There’s a default cover photo for every offering you create but if you want to personalise the offering and change the default photo, then you can do that by clicking on the Change Cover Photo option. You can either upload an image from your device or search for stock images.
As for the Title, you can choose to keep the same title that you added in the previous step or edit it on this page.
Custom’s Information: Here you have to add your HSN number. The Harmonized System of Nomenclature (HSN) is an internationally accepted method of naming, classifying and identifying products.
Customs authorities use this information to calculate duties while shipping. It is shown on printed customs forms.
After you add your HSN number, you can see the % of GST applicable on this product.

Click Next to save the added details and move to the next steps.
Step 4: Now, on the Pricing page, you will have to fill in more details - the price of the offering, who will bear the booking fees, a brief description of the offering, etc.
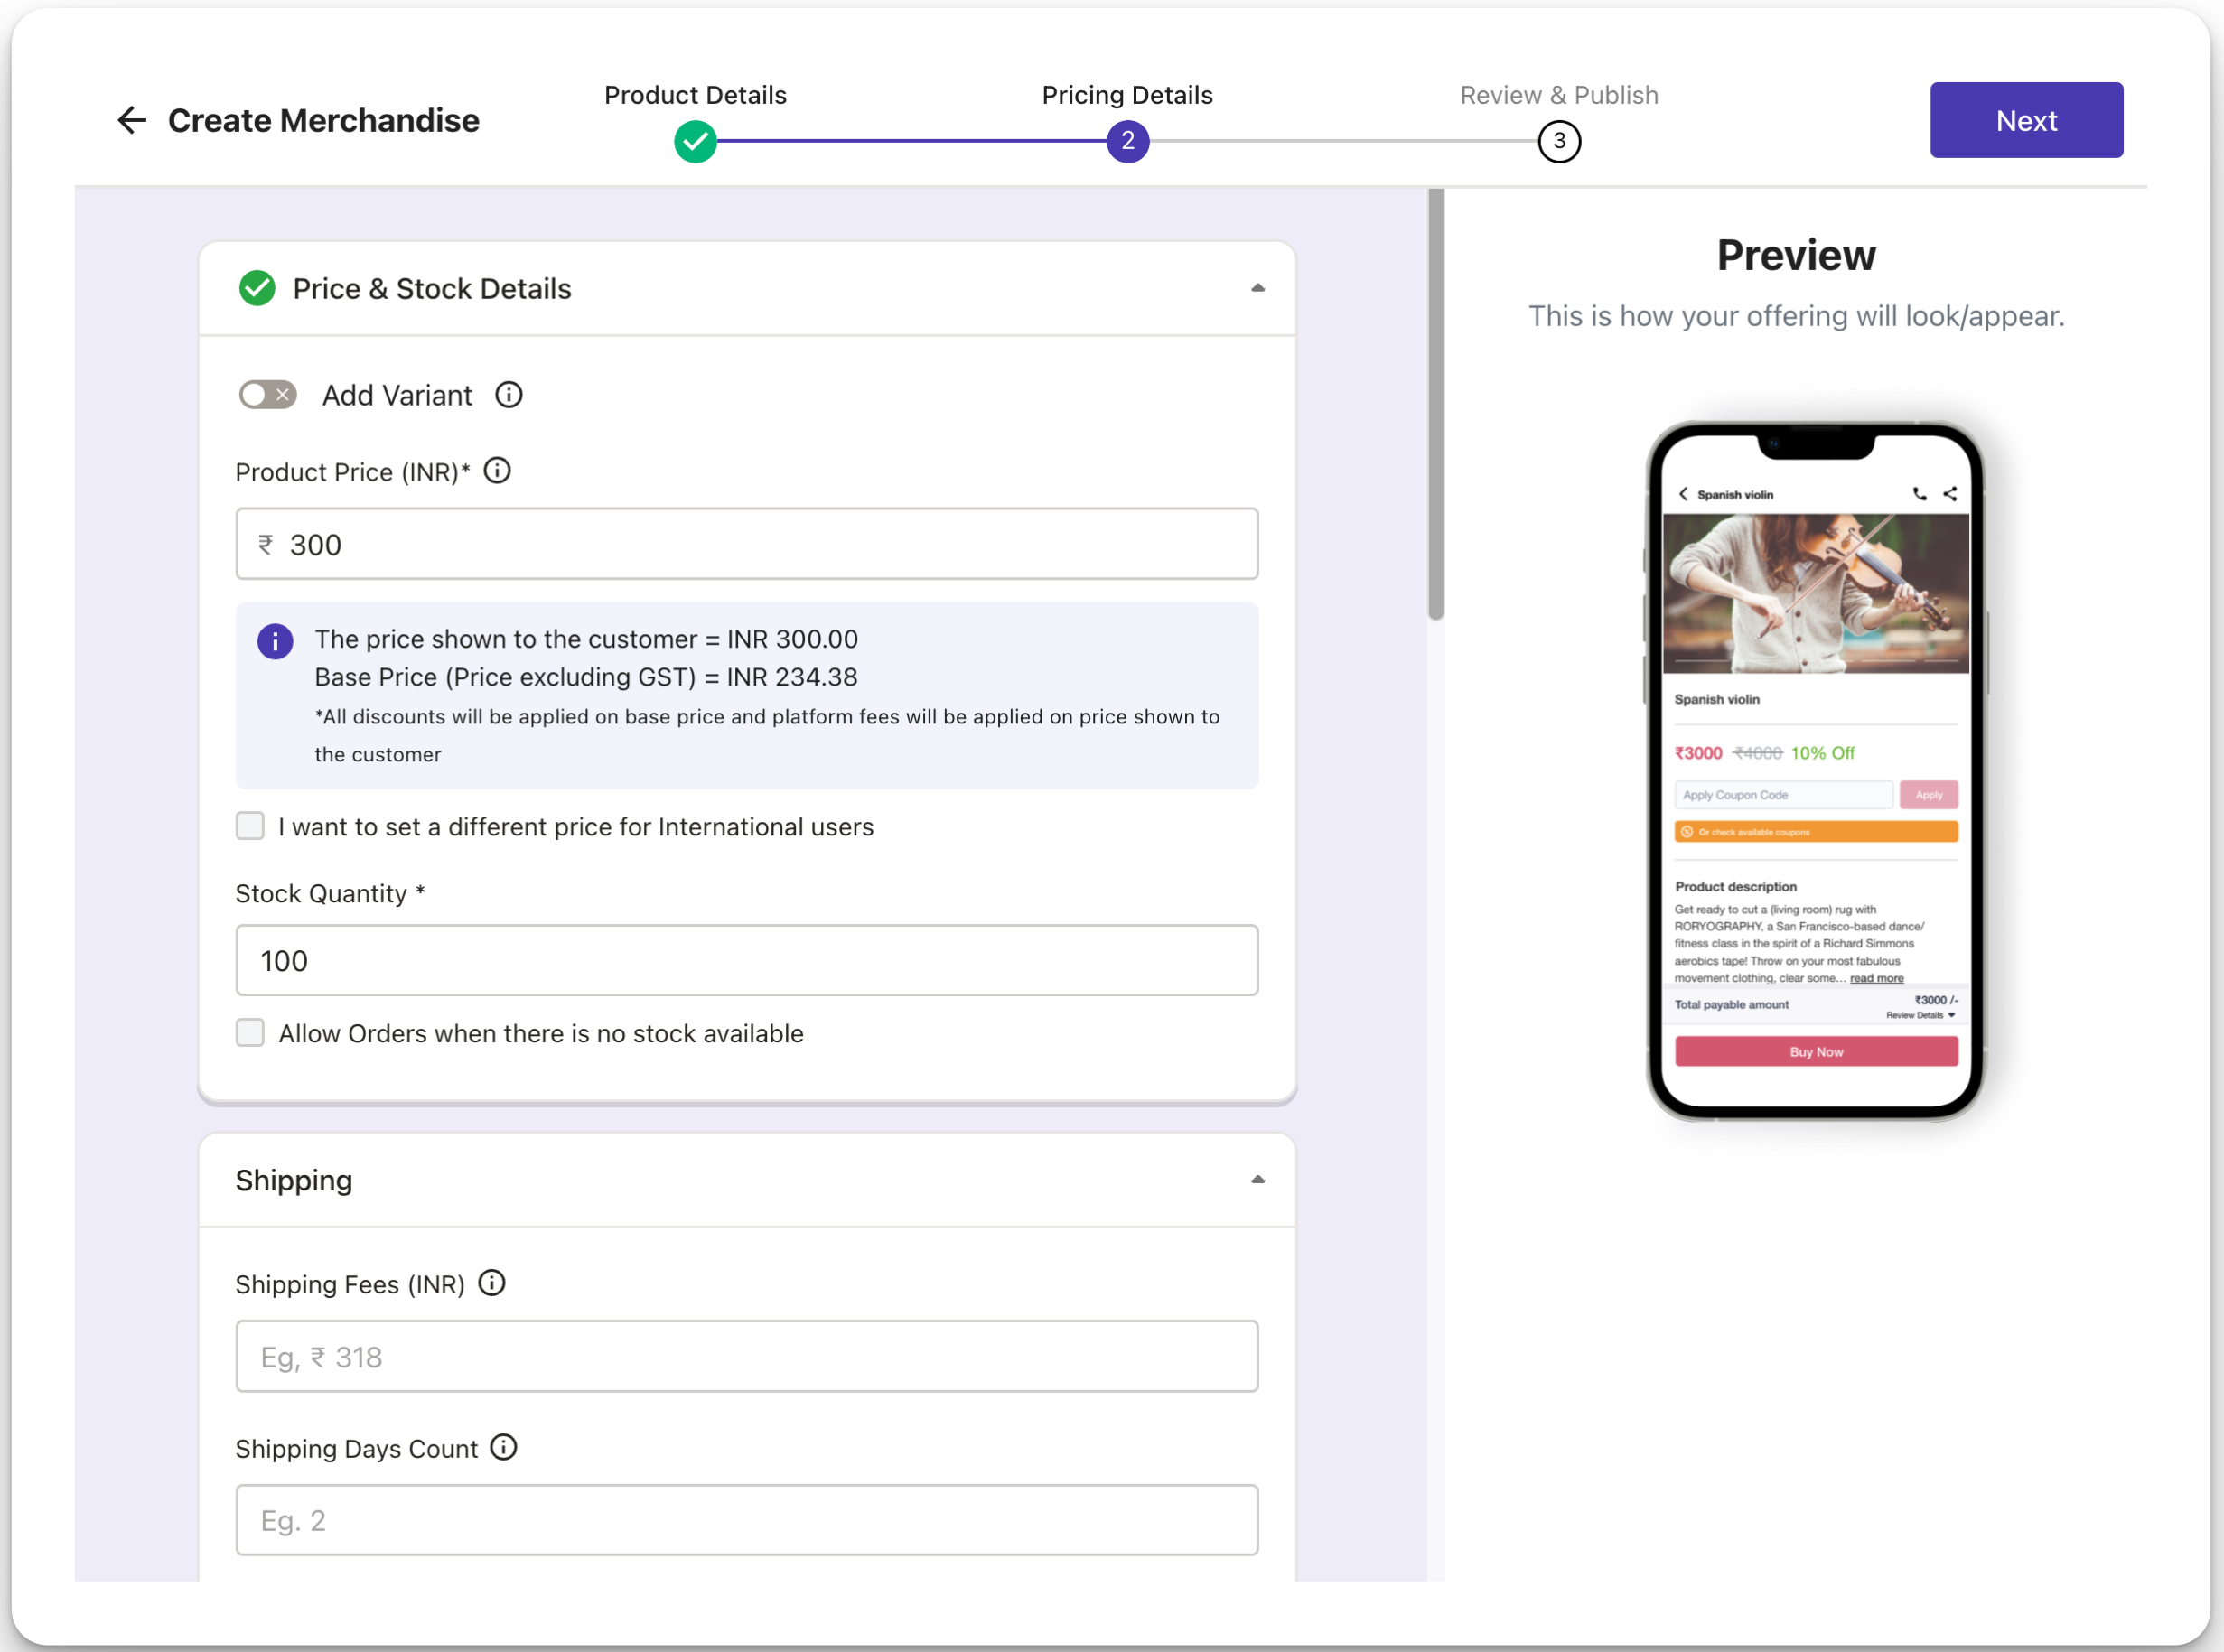
Price & Stock Details:
Add the price for your offerings. Remeber, the price shown to the customer and the base price are different. The price you enter is the price the customer will see and the base price is the amount after subtracting the GST.
All discounts will be applied on base price and platform fees will be applied on price shown to the customer.
After adding the price, add the stock quantity for this merchandise. By checking the box below the field, you can take orders even if the order runs out of stock.

For each merchandise, you can add more than 1 variant. To do so, toggle the Add Variant button.
Click the Add Variant button from the field that appears. You can add 4 types of variations
Size
Colour
Style
Custom - add a variant type of your own.

You can add more than one variant type but each type can only be added once. For example you can add 2 variant types of sizes and colours. For each variant added you’ll see the possible variations.
For each variant you add, you can change their pricing and and stock availability accordingly.

After adding the variations and pricing details, now enter the shipment information.
Enter the shipping fees and the shipping days count. You can also integrate Shiprocket for your shipments here. Learn more here.

Each time an offering is bought on Exly, there’s a booking fee that gets added to the price. However, you have the option to choose who will bear that booking fee - you (the creator) or the end-user. You can choose the preferred option from the drop-down menu.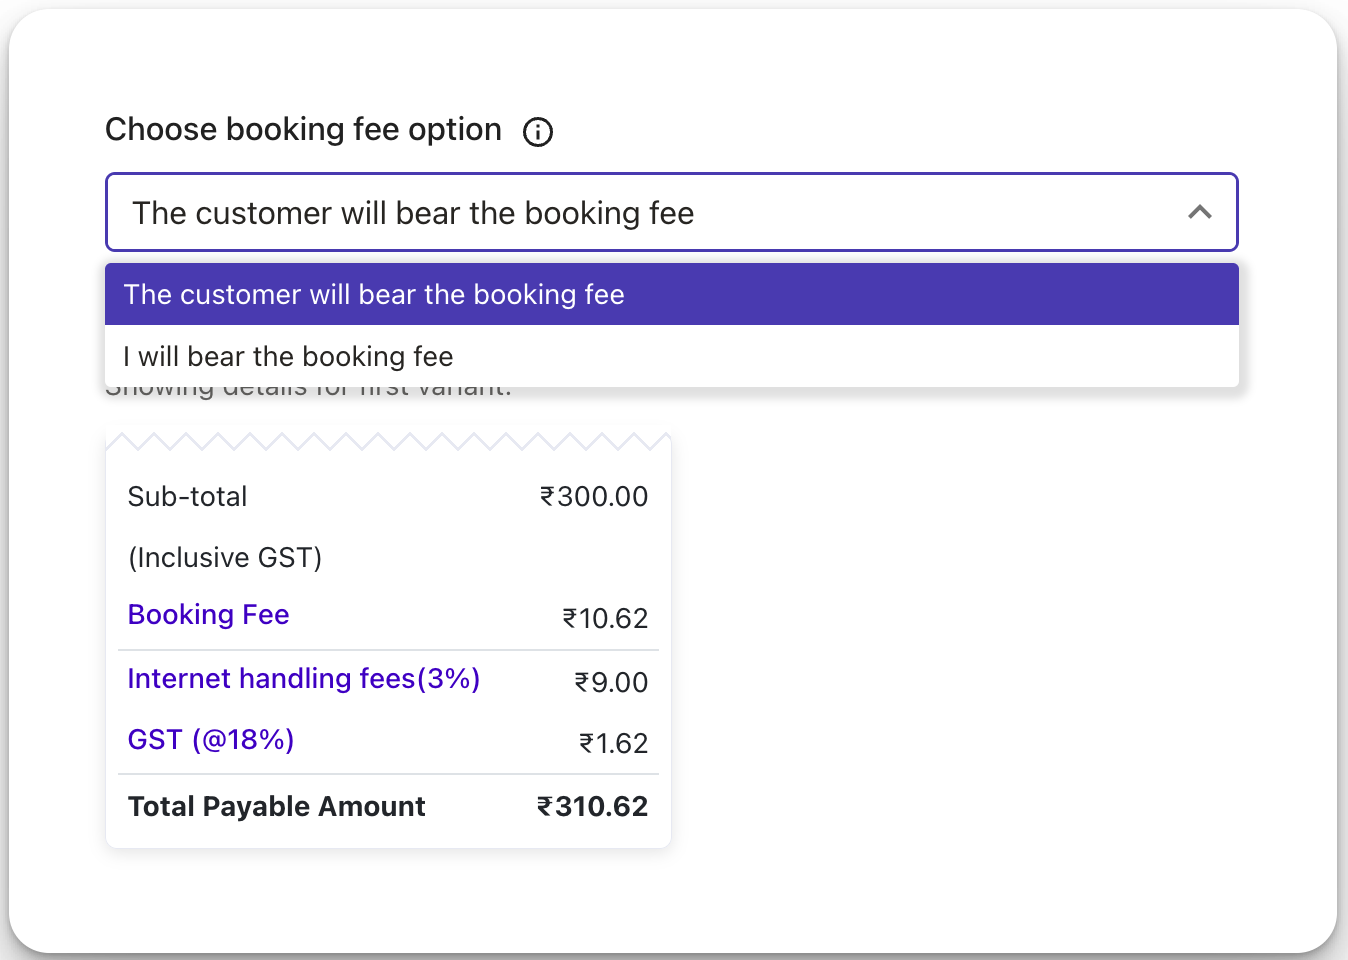
Although adding a description for the offering is optional, it is always a good idea to give a brief description or highlight a couple of key points. Not only does it give the customer more information about the product but also builds trust with them.
We know the customer would love to know more about your offering before they buy it. That’s why there is also a space for you to add the key highlights of your merchandise along with any requirements.

You can change the headings of these sections and add your own personalised titles.
Lastly, if you are on the paid plan of Exly and have team members added to your Add/Manage Staff tab, then you also have the option to assign this offering to any of them. The offering will, however, be assigned to you (the creator or owner) by default.

Step 6: Once you have made all the changes, click on the Next button. You will be redirected to a new page where you can review all the details added.
Step 7: After reviewing the details of the offering, you can either Publish the offering right away or click on Edit to make more changes.

Step 8: Once you publish your offering, a confirmation screen will appear along with the Invite Link.

Was this article helpful?
That’s Great!
Thank you for your feedback
Sorry! We couldn't be helpful
Thank you for your feedback
Feedback sent
We appreciate your effort and will try to fix the article