What are the benefits of build a Whatsapp Community?
Building a close-knit community on WhatsApp can be a game-changer for businesses, fostering deeper connections and unlocking numerous benefits. By establishing a dedicated space for your audience or customers, you create an environment where they can engage, share insights, and cultivate a sense of belonging.
This intimate communication channel allows for real-time interactions, enabling you to provide personalised support, gather valuable feedback, and foster a community that feels valued and heard. Whatsapp being the primary. messaging app for most people, acts as the perfect place to build an audience.
Here’s a step-by-step guide to help you create a Whatsapp community:
Step 1: From the Create an Offering page, go to the Communities card, select on the Whatsapp Communities button and click Next
Step 2: Fill in the details in the mandatory fields - add a title and price , and then click on Next.
If you already have a similar offering, you can choose to duplicate that and make this process simpler.
Step 3: You will be redirected to a new page wherein you will have to add more details like a cover photo for the offering, community title and the links for the Whatsapp groups.

There’s a default cover photo for every offering you create but if you want to personalise the offering and change the default photo, then you can do that by clicking on the Change Cover Photo option. You can either upload an image from your device or search for stock images.
As for the Title, you can choose to keep the same title that you added in the previous step or edit it on this page.
Next, create a group on whatsapp and add the link here. It is suggested that you add more than one link. Once a WhatsApp group get filled up to its max limit, we will automatically add the new member to the next group link added.
Click Next to save the details and move to the next steps.
Step 4: Now, on the Pricing page, you can edit the price of the community, who will bear the booking fees, a brief description of the community, highlights, requirements, and more.
You have two options for pricing. You can either keep the community free or keep a pricing for it.
If you choose the community to be paid, you get two more options
Lifetime access: Here, the customer will pay a one time access fee and be part of the community forever.

Subscription: The customer has to subscribe to your community and pay a fee after the set interval of time to keep being part of the community. Simply enter the price, payment cycle (time period for repeating the payment) and the start date of the subscription (if any)

If you’re on the paid plan, you are willing to offer the product or service (or offering) to international users as well, then you can simply select the checkbox under the pricing field. When you do that, make sure to add the pricing in USD (United States Dollar).
In case of subscription, you can also enable auto debit for international customers. This will ensure that the amount of the offering is deducted from your customers' account as soon as their subscription cycle ends. Note that this feature is currently in Beta. If you're interested in accessing this feature, please mail us at support@exlyapp.com to get early access.

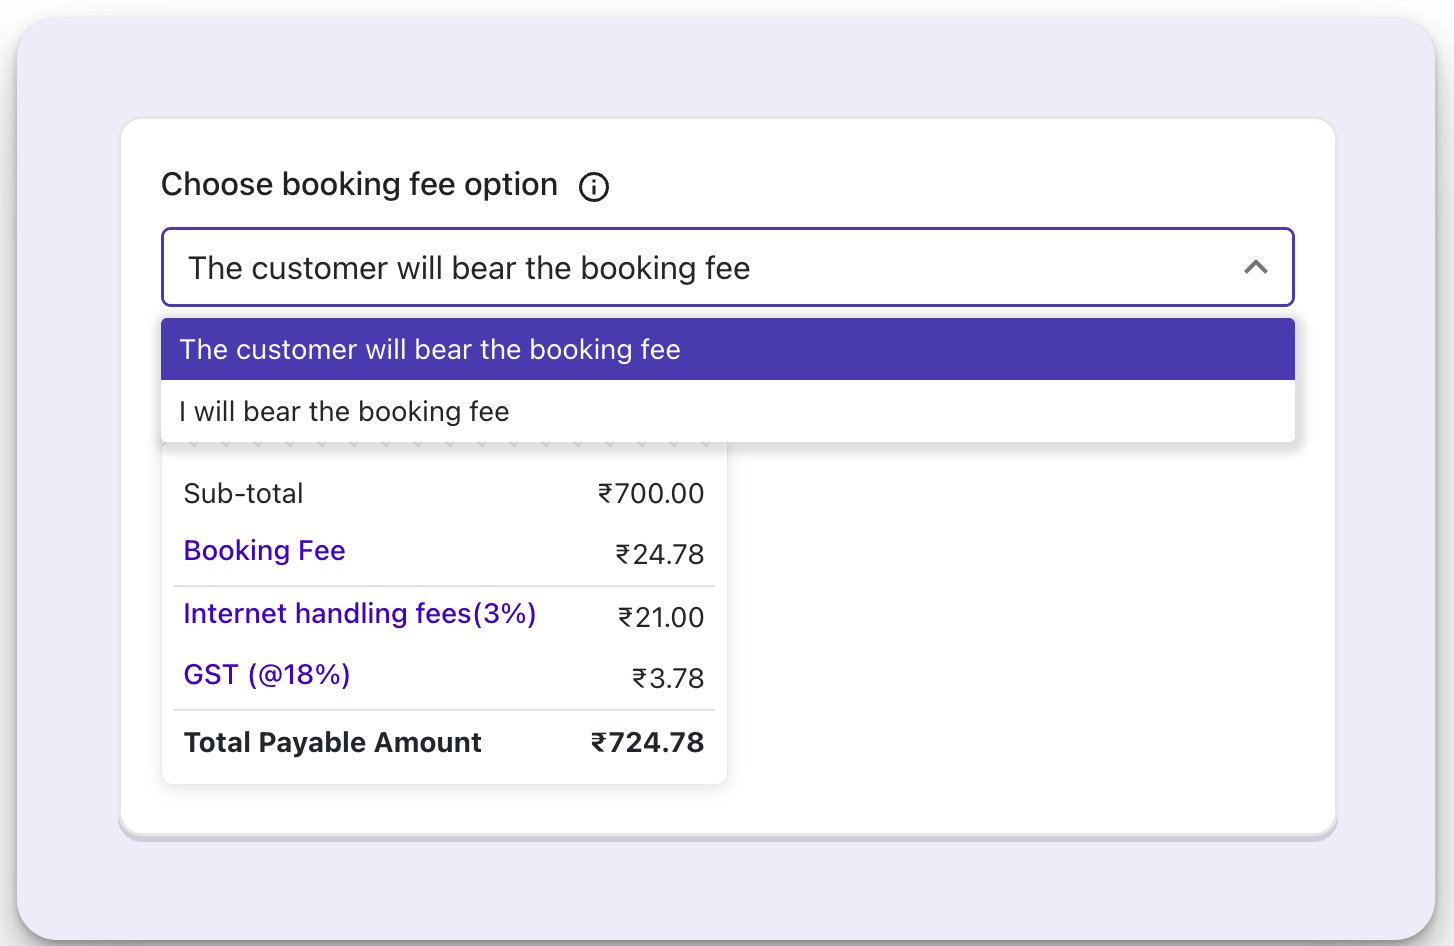
After adding the payment details, choose the booking fee. Each time someone pays for a community on Exly, there’s a booking fee that gets added to the price. However, you have the option to choose who will bear that booking fee - you (the creator) or the end user. You can choose the preferred option from the drop-down menu.
The break up of the sub-total - the booking fee, internet handling fees, GST, and total payable for both domestic and international users will get auto-generated.
Although adding a Community Description is optional, it is always a good idea to give a brief description of what the Whatsapp community serves to solve so that it gives the customers an idea of what they are signing up for.

Similarly, you can also mention some Highlights and Requirements (both optional) for the customers. All this information will eventually help your customers get clarity on the value your Whatsapp Communities will bring to them.

If you’re on the premium plan and have team members added to your Add/Manage Staff tab, then you also have the option to assign this offering to any of them. The offering will, however, be assigned to you (the creator or owner) by default at first.

Step 5: Once you have made all the changes, click on the Next button. A window with all the information for your whatsapp community will open. After reviewing the details of the community that you have just created, you can either Publish it right away or click on Edit to make more changes.

Step 6: Once you publish it, a confirmation screen will appear along with the Invite Link.
You can either copy the invite link directly and share it with the clients manually, invite them via email, or share the offering directly on WhatsApp.

All your published and/or draft offerings will appear on the right side when you click on the Create/Edit Offerings option.
You can share (only live or published offerings), edit, duplicate, or delete any offering from this page.
Additionally, you also get an option to copy the checkout page link and share it with your customers. 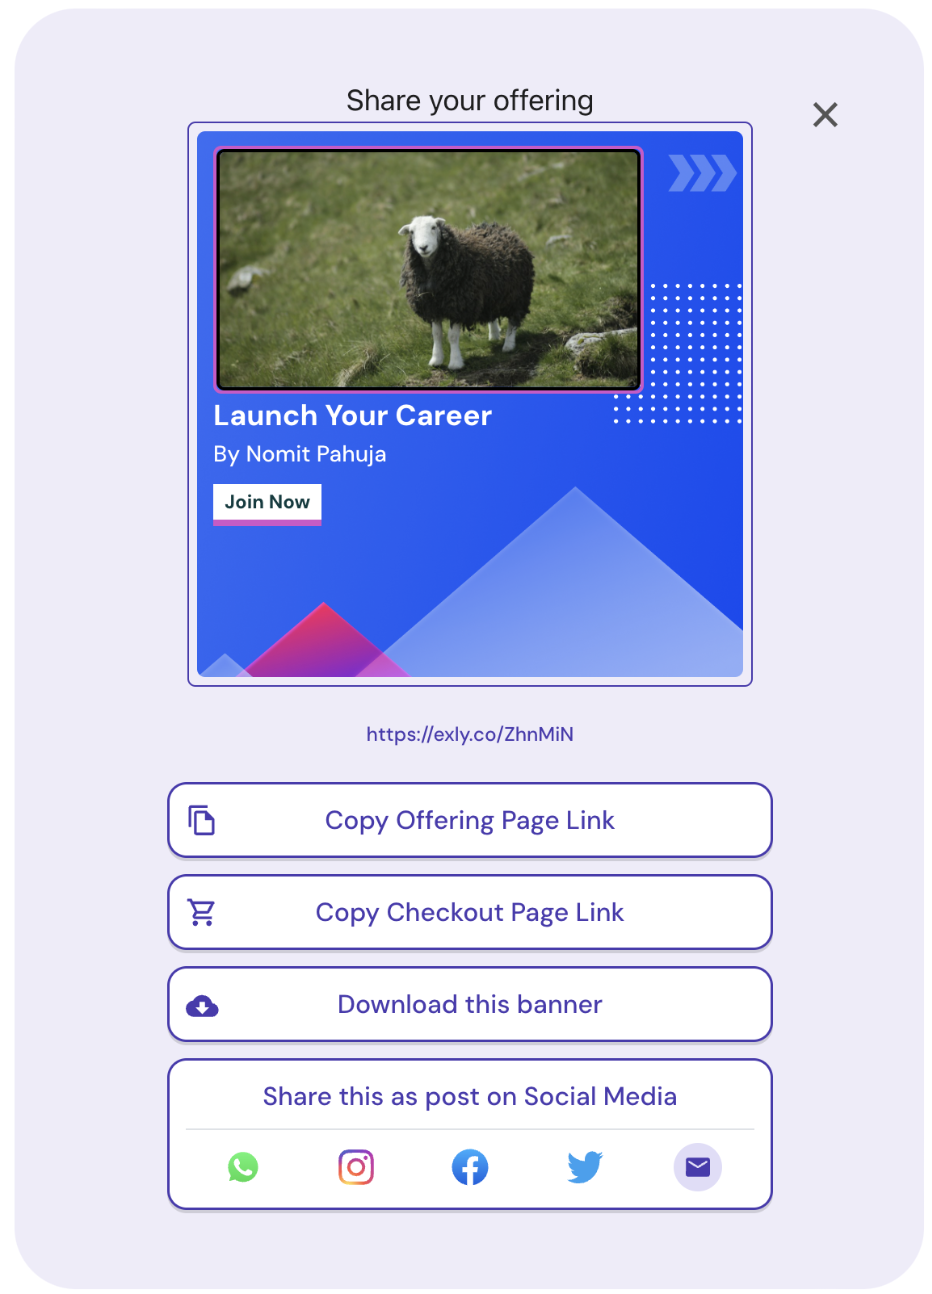
The checkout page automatically picks the description you've added to the offering. By entering only the purchase details such as name, email & number, you can now easily take payments from your customers and grow your business.
Was this article helpful?
That’s Great!
Thank you for your feedback
Sorry! We couldn't be helpful
Thank you for your feedback
Feedback sent
We appreciate your effort and will try to fix the article