When you create an offering for online/offline workshops, you are doing that with the intent of hosting interactive, educational sessions for the enrollees (end-users). You can choose to offer single or multiple sessions on fixed dates and time slots.
Here’s how you can create Online/Offline Workshops on Exly within 3 minutes:
Step 1: From the Create/Edit Offering page, go to the Workshops card and click on the Start Creating button.

Step 2: Fill in the details in the mandatory fields - add a title and price - for the workshop, and then click on Next.
If you already have a similar offering, you can choose to duplicate that and make this process simpler.
Step 3: You will be redirected to a new page wherein you will have to fill out more details about the offering like the title, workshop location, timings, etc.
There’s a default cover photo for every offering you create but if you want to personalize the offering and change the default photo, then you can do that by clicking on the Change Cover Photo option.
You can either upload an image from your device or search for stock images.

As for the Title, you can choose to keep the same title that you added in the previous step or edit it on this page.
In the Workshop Location field, you can choose the option that works the best for you.

If you select the Google Meet option, a meeting link will get generated automatically. Make sure you are using one of your own devices when you select this because the link will be generated from your Google Meet account.
When you are creating an offering for the first time, you will be asked to Sync Exly with your Google Calendar, if you haven’t already done that using the Integrations tool.
If you select the Zoom option, a meeting link will get generated automatically, and you will be asked to log in to your Zoom account as a one-time activity.
If you select the Online Meeting Link option, you can manually add the meeting link and password.
If you select At My Personal Address option, you will be asked to add your complete address.
If you select the Customer’s Address option, the customer will be asked to provide their address when they make the booking.
If you select the Phone option, you will have to provide your phone number.
And lastly, if you select the WhatsApp option, you will have to add the phone number that’s available on WhatsApp.
Now, set the duration of each session in hours and/or minutes along with the start date and time of the session. You have the option to add multiple sessions.
To streamline your booking process even more, we've made sure your schedule is managed effectively. Any session you create will be blocked and visible in the My Schedule page. When you create another offering that is a webinar, workshop or an appointment - the session from your current offering will remain blocked and your customer will not be able to book a slot during that time.
This helps you to keep your calendar clean and avoid clashes of overbooking or double sessions.

Step 4: Click on the Next button on the top right of the screen to save the added details. If a conflict in timing is detected after clicking "Next," you can choose to "Proceed Anyway" or adjust the workshop timing. This integration eliminates manual schedule cross-checking, allowing you to focus on providing an exceptional educational experience.
On the right side of this page, you will see a Preview of how your offering will appear to the end-users.

Step 5: Now, on the Pricing page, you will have to fill in more details - the price of the offering, who will bear the booking fees, a brief description of the offering, etc.
The price added for the offering on the first page will automatically appear in the Price field. However, you can always edit it. Make sure you add the pricing details in INR (Indian Rupee) only.
Each time an offering is bought on Exly, there’s a booking fee that gets added to the price. However, you have the option to choose who will bear that booking fee - you (the creator) or the end-user. You can choose the preferred option from the drop-down menu. The break up of the sub-total - the booking fee, internet handling fees, GST, and total payable for both domestic and international users will get auto-generated.

Although adding a description for the offering is optional, it is always a good idea to give a brief description or highlight a couple of key points that you would be discussing during the workshop. Not only does it give the enrollees an idea of what they are signing up for, but it also helps the creator focus better and be well-prepared for the session.

We know the enrollee would love to know more about your offering before they buy it. That’s why there is also a space for you to add the key highlights of your workshop along with any requirements.

You can change the headings of these sections and add your own personalised titles.
Lastly, if you are on the paid plan of Exly and have team members added to your Add/Manage Staff tab, then you also have the option to assign this offering to any of them. The offering will, however, be assigned to you (the creator or owner) by default.

Step 6: Once you have made all the changes, click on the Next button. You will be redirected to a new page where you can review all the details added.
Step 7: After reviewing the details of the offering, you can either Publish the offering right away or click on Edit to make more changes.
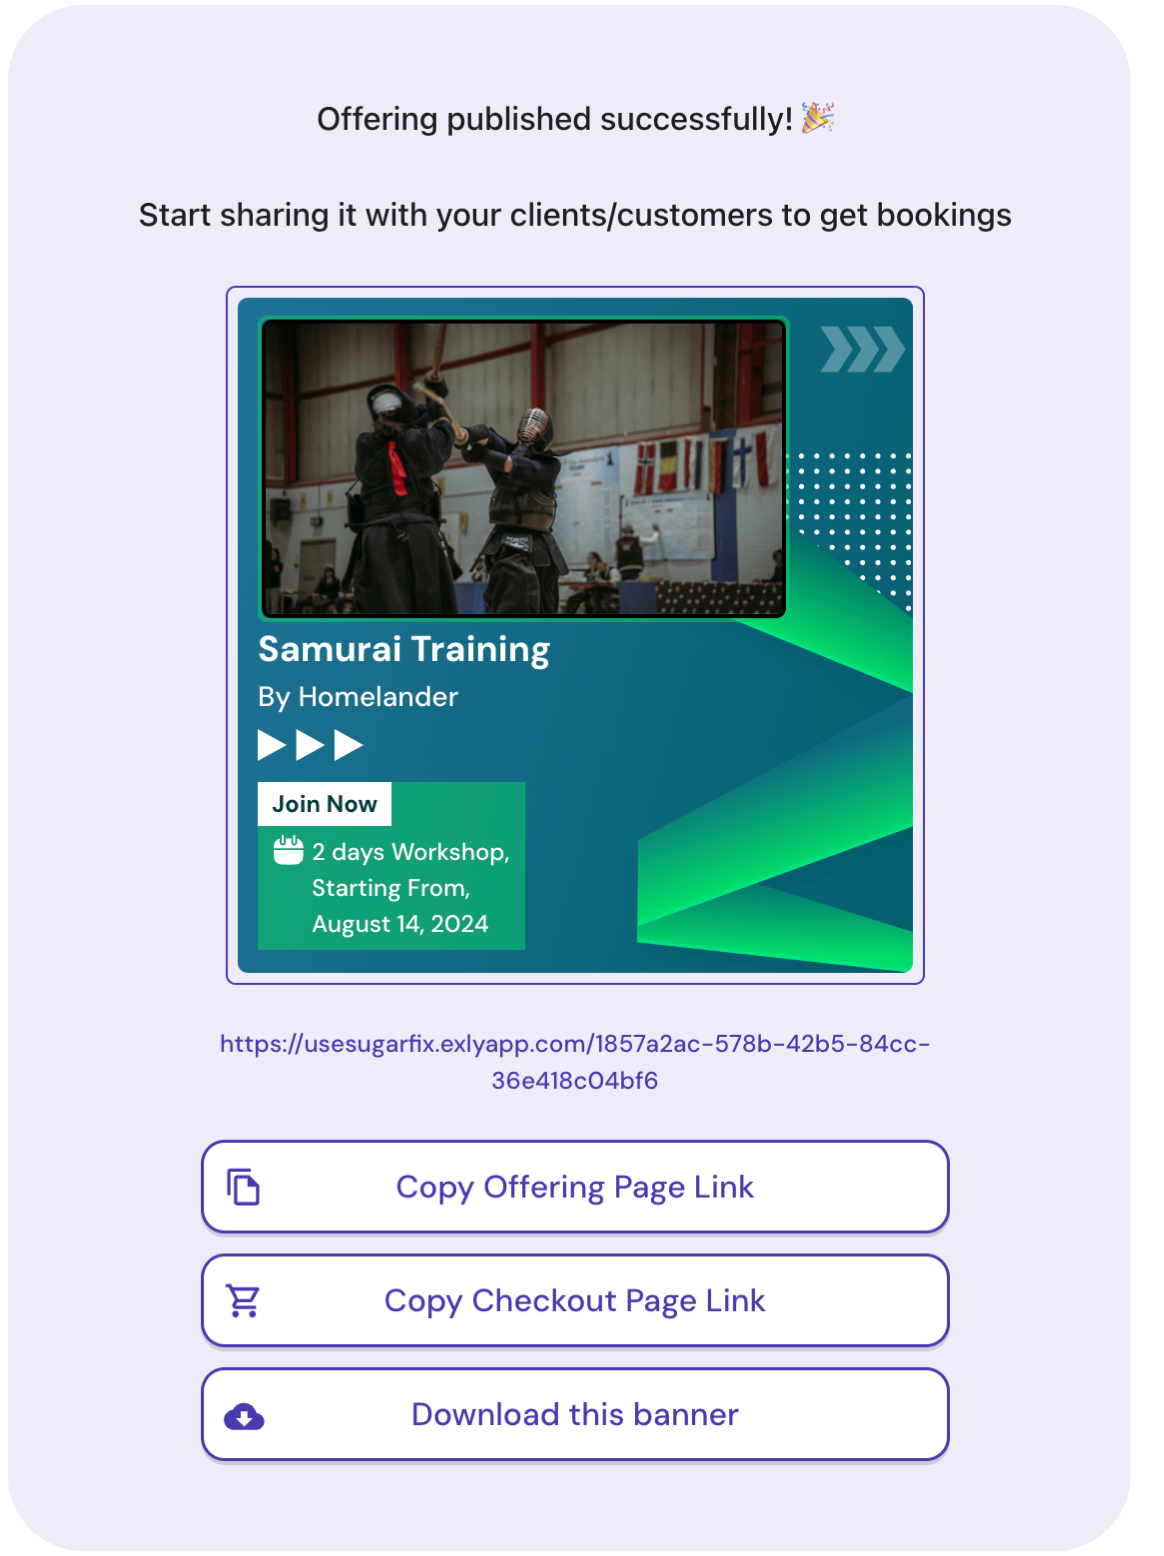
Step 8: Once you publish your offering, a confirmation screen will appear along with the Invite Link.
You can either copy the invite link directly and share it with the clients manually, invite them via emails, or share the offering directly on WhatsApp.
All your published and/or draft offerings will appear on the right side when you click on the Create/Edit Offerings option. You can share (only live or published offerings), edit, or delete any offering from this page.
Additionally, you also get an option to copy the checkout page link and share it with your customers.
The checkout page automatically picks the description you've added to the offering. By entering only the purchase details such as name, email & number, you can now easily take payments from your customers and grow your business.
Note: Exly calendar is now synced for workshops, webinars and appointments. For example, if you have an appointment available from 9AM to 9PM and then you also have a workshop from 6-9PM, then automatically your appointments available will be from 9AM-6PM. Similar is the case with webinar.
Was this article helpful?
That’s Great!
Thank you for your feedback
Sorry! We couldn't be helpful
Thank you for your feedback
Feedback sent
We appreciate your effort and will try to fix the article