What are Plan in Exly?
A plan is a bundle of similar offerings that are clubbed together to provide multiple options to a user.
Grouping similar offerings together and selling them as a plan is a strategic approach that provides businesses with multiple benefits. By bundling similar products or services, you create a comprehensive solution that offers enhanced value to your customers.
This way you can streamline the purchasing process for the user and make it more convenient for the users to find the right offering that matches their needs. Instead of having to navigate and search for individual items separately, they can view all the similar offering in a single section and purchase the one that they want.
Here’s a step-by-step guide to help you create Plans for your offering. :
Step 1: On the Creator Tool page, click on Create/Edit offering. From the tabs mentioned on top, click on Plans
Click on Create Plan and enter the name for the same.
Step 2: To create a Plan, you’ll need to complete three major steps - defining information about the Plan, adding description and visibility and at last reviewing the information before publishing it.
1. About Plan
You can add a cover image for your offering. A default image has already been saved. To change it, click on the camera icon in the bottom right of the cover. You can either upload an image from your local device or choose an stock image from the options provided.
Plan Title is the same name you provided while first creating the plan. You can also edit this name here.
Now select the offering type for the plan. Remember a plan have have offerings from only one category such as webinar, class, community etc.
After selecting the type, select the offerings that you want to add in the plan from the drop down menu. If you don’t see the right offerings, you can also create a new one by clicking on the Create an Offering button.
After selecting the offerings for the plan, you can mark one as recommended to give users a nudge.
Select the circle for the offering that you want to recommend. To show this recommendation tag to the users, check the Show ‘Recommended’ tag on the webpage checkbox.
Click Save & Next button to add plan descriptions.
2. Description & Visibility
Write a description for the Plan you are offering. Make sure to keep it engaging and captivating to best convey the benefits of your offering.
On your webpage, the plan’s card will show the price of the cheapest offering in the bundle. Choose the offering visibility from the two options given.
Hide individual listings from website: The listings added in the plan cannot be visible on the website. They can only be brought through the plan you’re offering.
Make individual listings visible on website: The listings that you’ve added to your plan can also view viewed separately are stand alone products. That is, the user will be able to see the listings individually as well as inside the plan
After setting the visibility and writing a description, click on Save & Next to move to the final review.
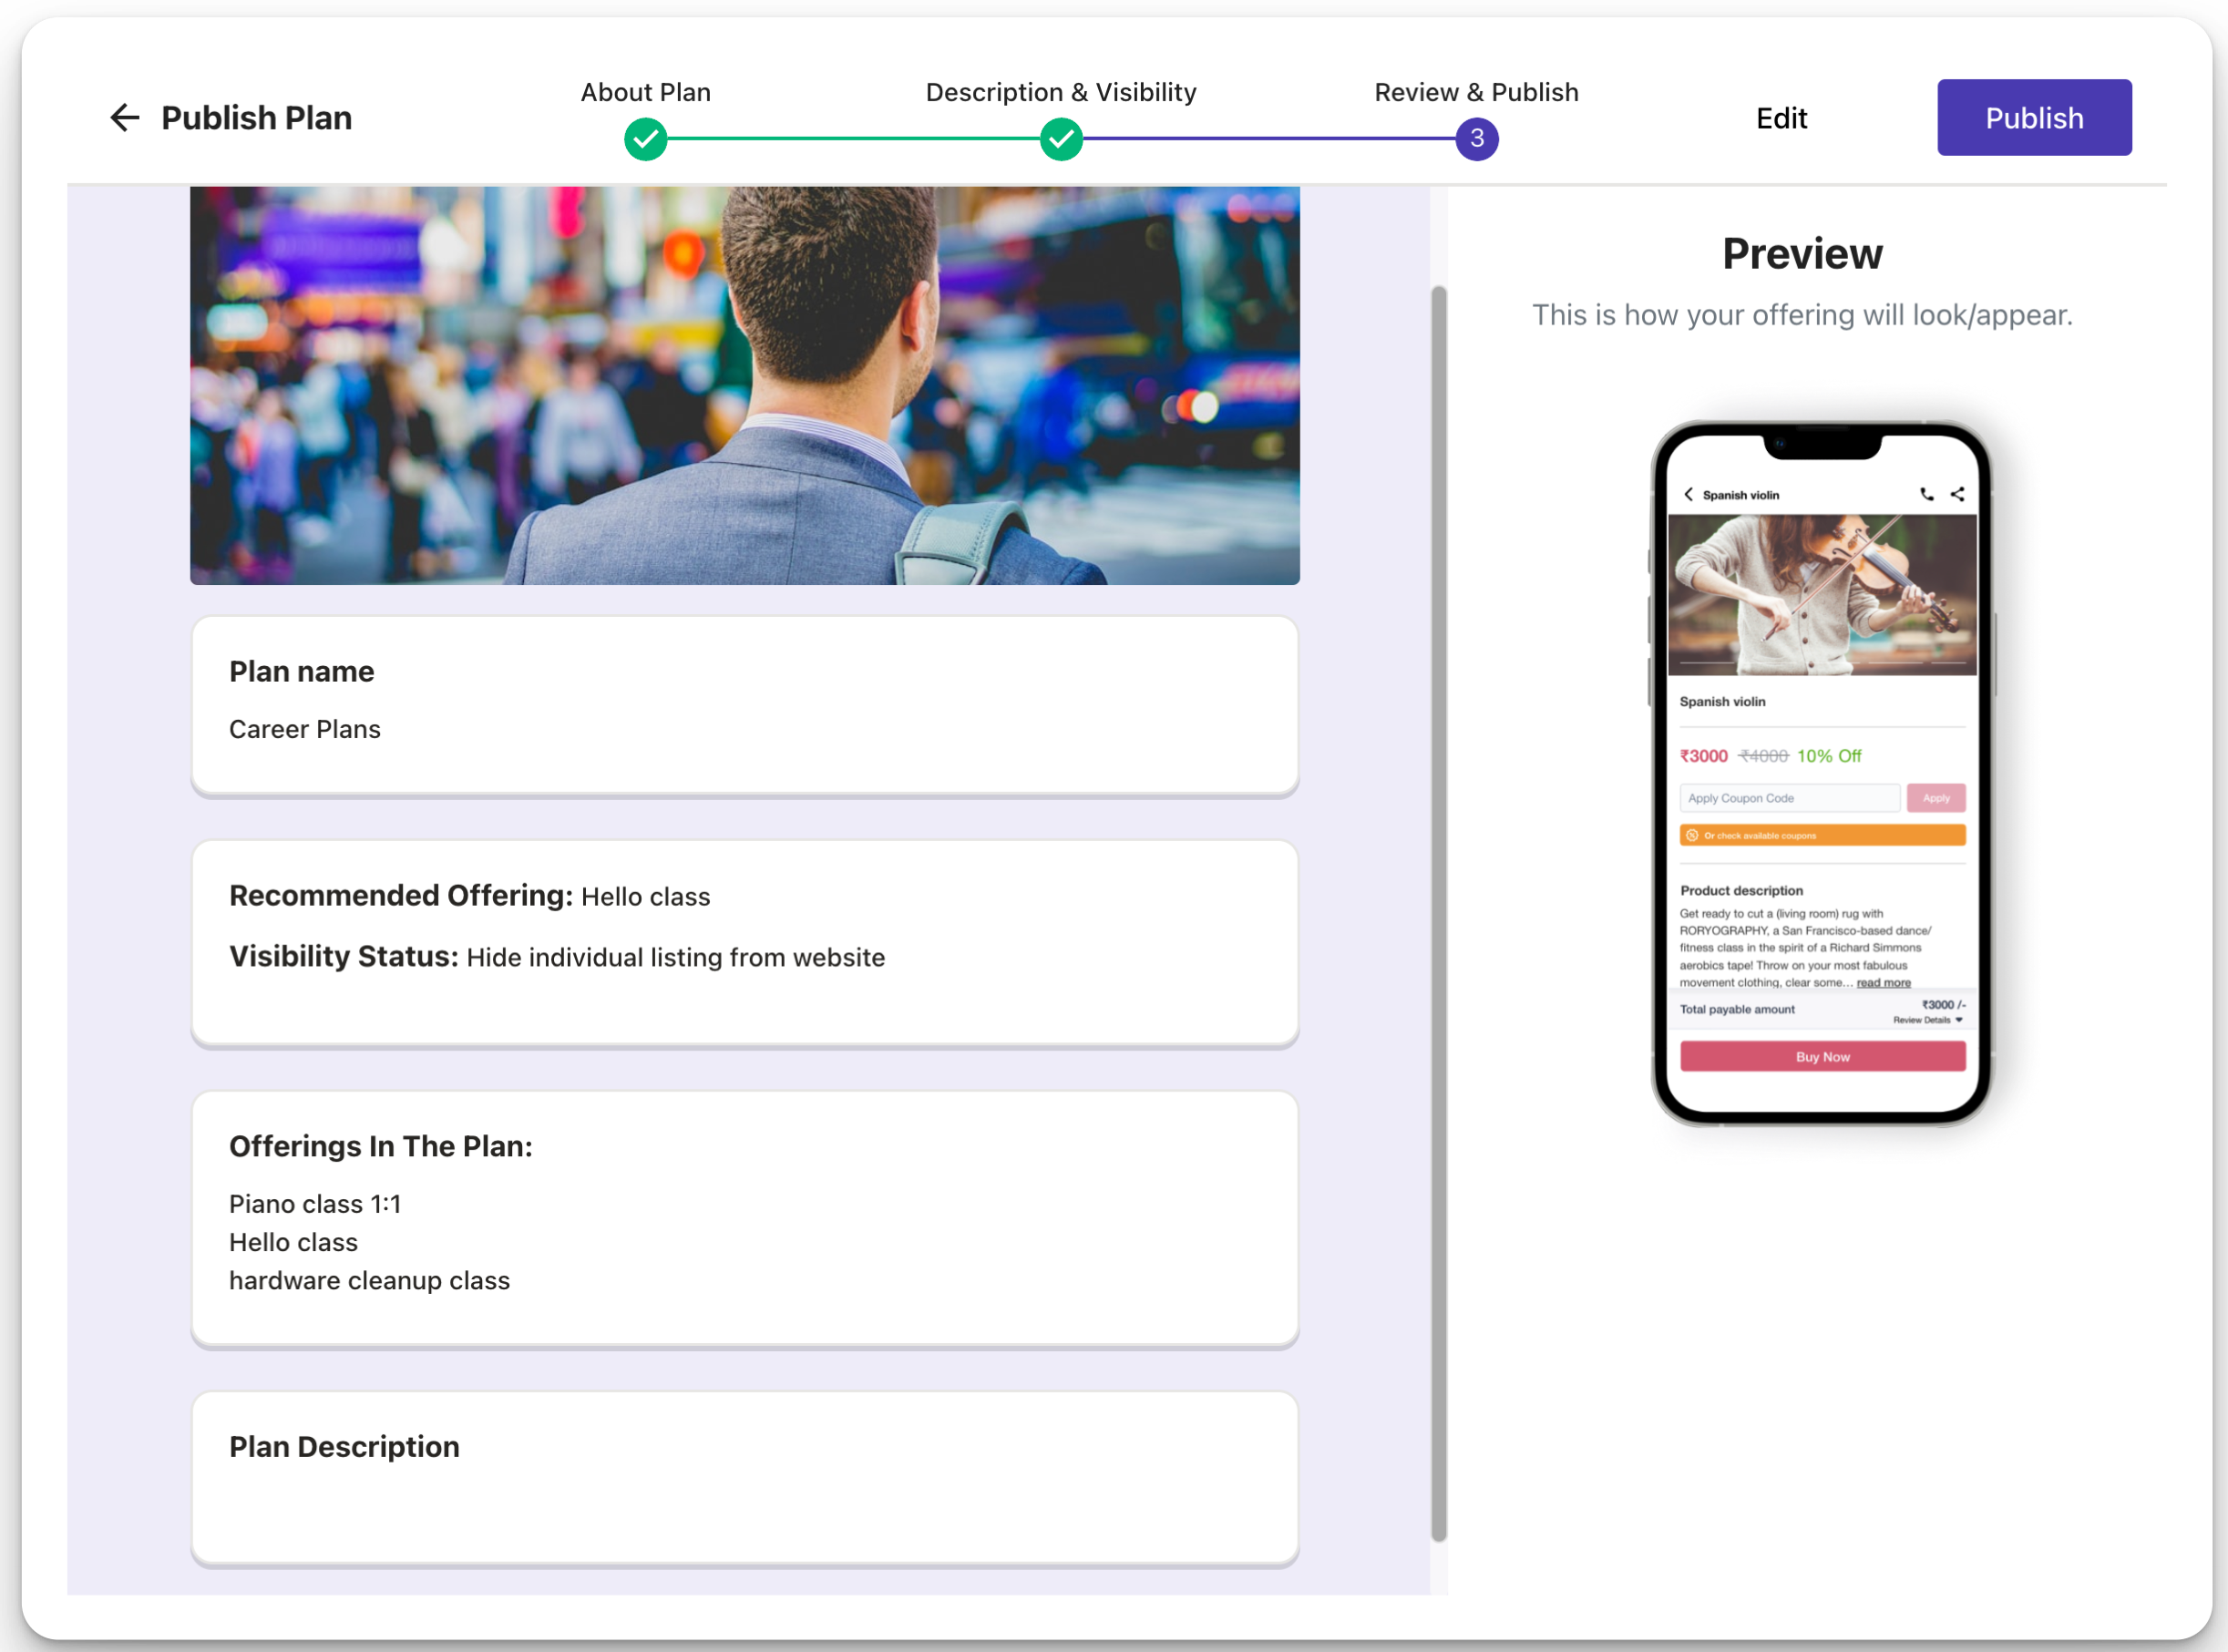
3. Review and Publish:
Review all the information for your Plan carefully before publishing it. Make sure you check the recommended offering (if any) and the offerings you’re providing in the plan.
Once set, click on Publish. Your offering is now live and ready to be shared among your audience.
Was this article helpful?
That’s Great!
Thank you for your feedback
Sorry! We couldn't be helpful
Thank you for your feedback
Feedback sent
We appreciate your effort and will try to fix the article

