As a business owner, email marketing is one of the most effective ways to connect with your audience. It allows you to directly reach customers in a cost-efficient manner, promoting your products, services, and special offers while keeping them engaged with your brand.
Email campaigns help nurture customer relationships, ensuring they stay informed about your latest updates. Plus, with built-in analytics, you can track engagement, optimize your messaging, and make data-driven decisions to enhance your marketing strategy.
Exly’s Email Campaigns tool makes it easy to draft, schedule, and send customized emails to your customer base. Whether you're announcing exclusive discounts, launching new offerings, sharing newsletters, or delivering time-sensitive updates, this tool helps you streamline communication and drive business growth effortlessly.
How to use the Custom Emails tool on Exly?
You can send customized emails to your customers by following this easy-to-follow guide:
Step 1: On the Creator Tool page, scroll down to the Sales & Marketing section on the left side of the screen and click on the Email Campaigns card.
Step 2: To compose a new email, click on the Compose button on the top right side of the page.

From the screen select Email Broadcast and click Continue.
[Learn how to create and launch Drip Campings from here. ]
Step 3: You will be redirected to a new page wherein you can: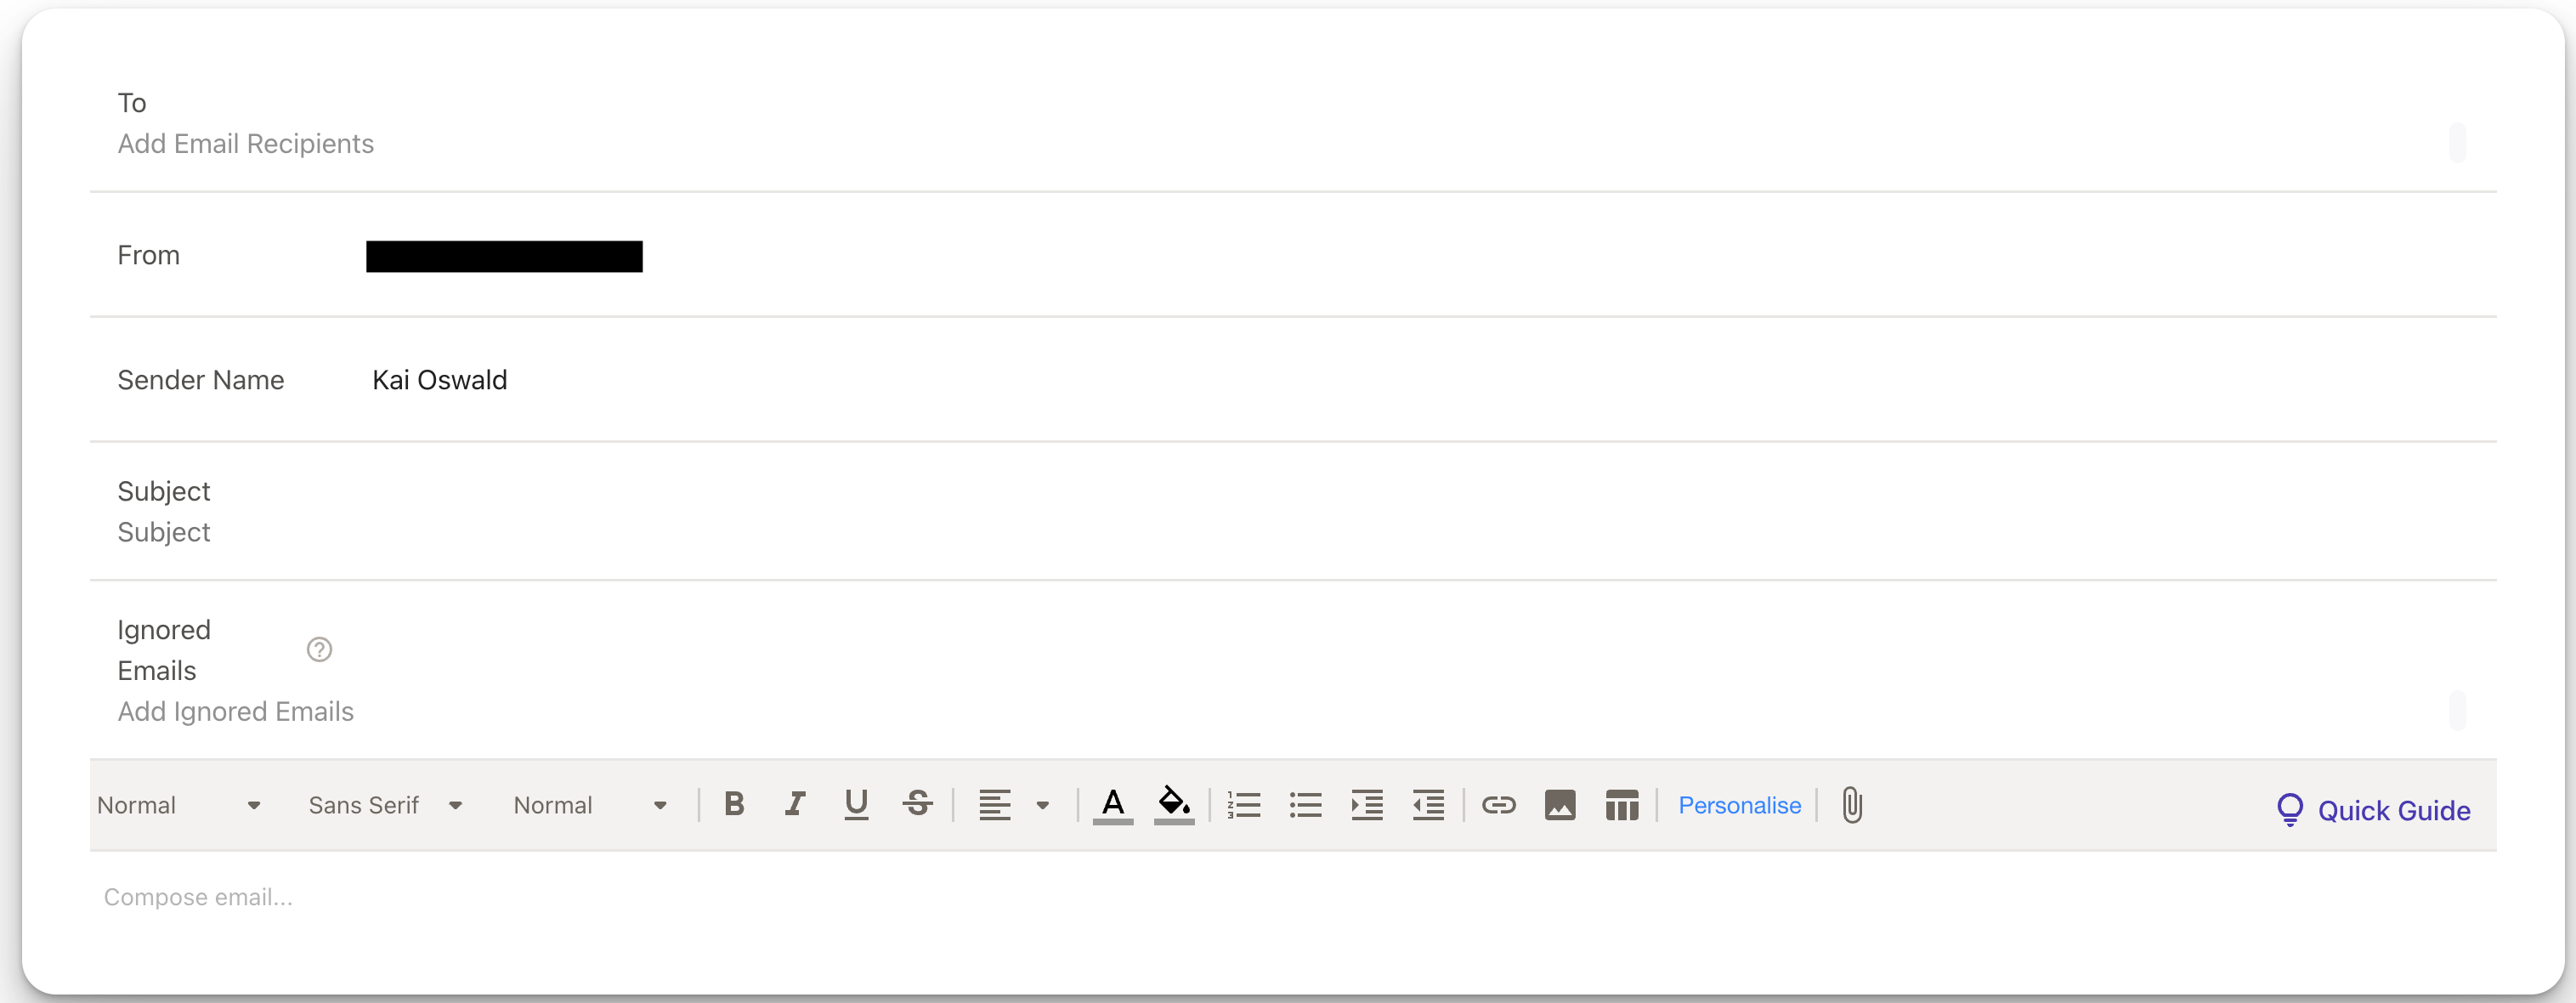
Add email recipients for the customized email by adding email IDs in the To section. When you click on the add email recipients field, it will suggest some predefined segments and recipient groups. This comes in handy especially when you want to use this tool for target marketing and reaching out to a larger audience.
For offerings with part-payment customers, you can select one-time payment and part-payment customers separately or combined, giving you complete control over your audience selection.
Add a subject line that is crisp enough to give the recipients an idea of what the email is all about. You can add personalisation variables directly in the subject line, making your emails more attention-grabbing, engaging and tailored to recipients.
Campaign is picked for collecting and sending mails and can remain in processing state upto 24 hours max. You can choose to add Ignored Emails that will not be sent when this campaign is in the processing state.
Add the body copy for your custom email in the text box and format it as per your requirement. You can even add a media file (image, documents, etc.) to the email in order to make it more informative and engaging.

Add a block to your email for a discount code, limited-time offer, or a button (offering). Remember that you can only add one block per email.

Adding a Discount Code:
In case you already have an existing offer, you can simply select the offering that you wish to provide the discount code for by choosing the offering from the drop-down menu. Click on the Save button to complete the process.
If you have to create a new discount code, click on the Need to create a new offer button and fill in the required details like what percentage of discount are you willing to offer, the discount code, discount value, the number of times a code can be used, who all can use this code, and decide whether or not to apply this to the final cost of the product/service with GST. Click on the Save button to complete the process.
All discount codes expire in 30 days automatically.
Adding a Limited Time Offer:
If you want to share a limited-time offer, click on the Limited Offer block. A new window will appear on your screen.

In case you already have an existing offer, you can simply select the offering that you wish to provide the limited-time offer for by choosing the offering from the drop-down menu. Click on the Save button to complete the process.
If you have to create a new limited-time offer, click on the Need to create a new offer button, select the offering that you wish to provide this offer for, and fill in the required details like the offer name and what are the start and end dates along with time. Click on the Save button to complete the process.
Adding a Button:
If you want to share a new offering, click on the Button block. A new window will appear.

Step 5: Once you have added the body copy and the block of your choice, click on Preview to see how your customized email will look on full screen.

You can also send the email right away by clicking on Send or schedule it for a later date and time by clicking on the clock icon.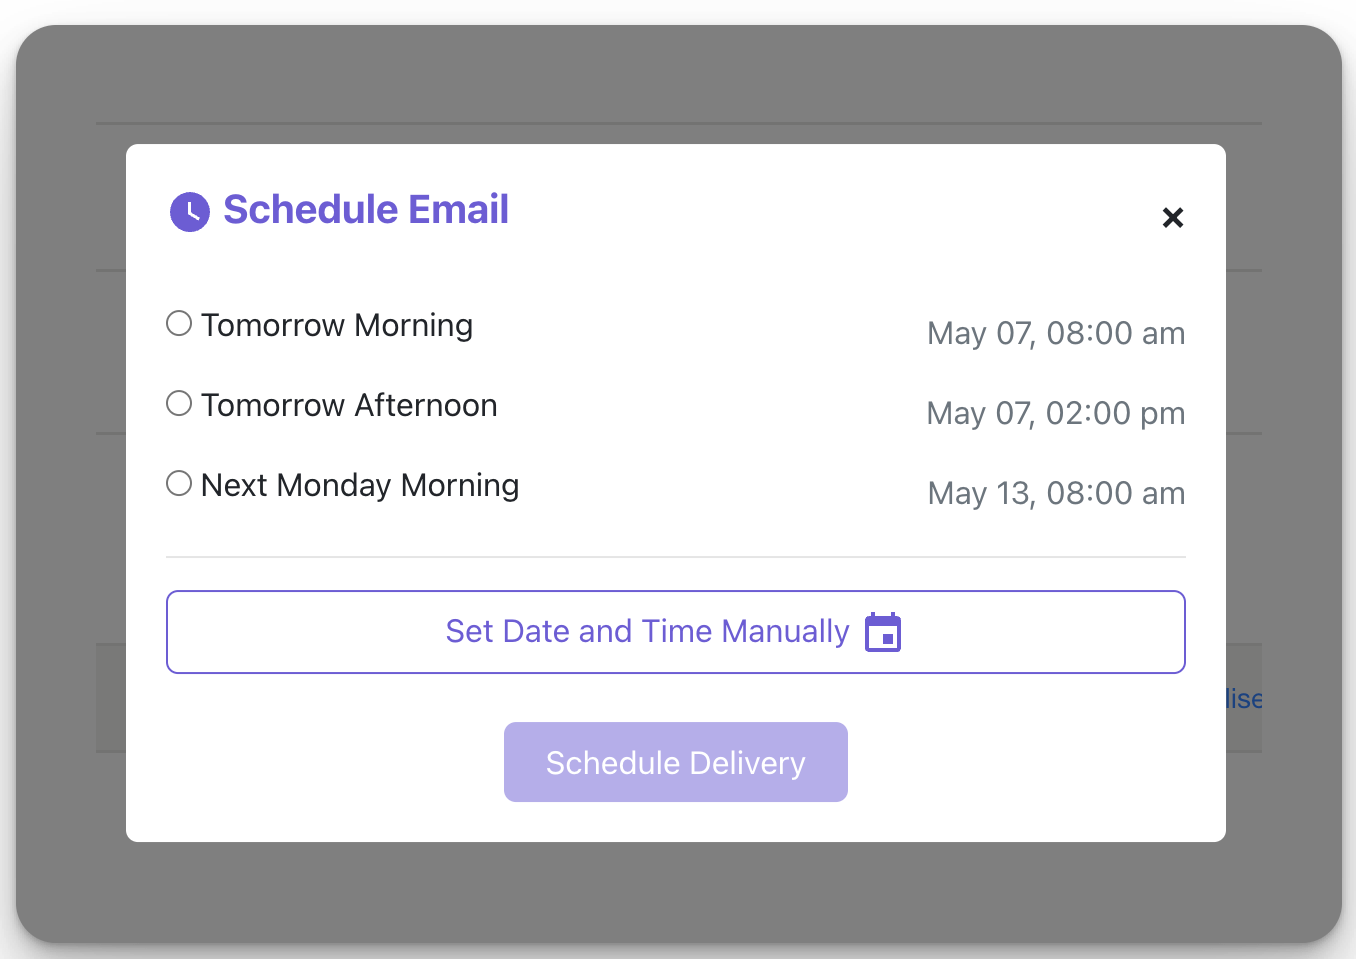
The emails you are composing keep getting saved automatically and can be accessed from the Drafts tab.
You can access your past emails, drafts, and scheduled emails from the main Custom Emails page.

Was this article helpful?
That’s Great!
Thank you for your feedback
Sorry! We couldn't be helpful
Thank you for your feedback
Feedback sent
We appreciate your effort and will try to fix the article