What are drip campaigns?
Drip email campaigns are automated sequences of emails sent out over a period, delivering targeted and relevant content to subscribers or customers. These campaigns play a crucial role for creators in nurturing leads, engaging audiences, and fostering long-term relationships.
What are the benefits of setting up drip campaigns?
By setting up drip email communications, businesses can provide a personalised experience for recipients, guiding them through a structured journey that aligns with their specific interests, pain points, or stage in the customer lifecycle. Each email in the sequence is carefully crafted and timed to deliver value, whether it's educational resources, exclusive offers, or timely reminders.
Drip campaigns enable creators to stay top-of-mind and maintain consistent communication without the need for manual intervention. This automated approach not only saves time and resources but also ensures a seamless and cohesive experience for the recipient, preventing them from feeling bombarded or overlooked.
How to setup Drip Campaigns on Exly?
You can create drip campaigns and send targeted emails to your customers by following this easy-to-follow guide:
Step 1: On the Creator Tool page, scroll down to the Sales & Marketing section on the left side of the screen and click on Email Campaigns.
From the Email Campaigns screen, click on Drip Campaigns.
Step 2: Click on Create Email button on the top right of the screen. From the pop up select Drip Campaign and click on continue.
Give your Drip Campaign a name and click Next. Make sure that the name of the drip campaign is unique and easy to understand as it will make the analytics easier for you.
Step 3: The process of creating a drip campaign has 3 steps - Setup, Drip Flow and final Review. At all steps you can save the campaign as as draft and continue setting it up later.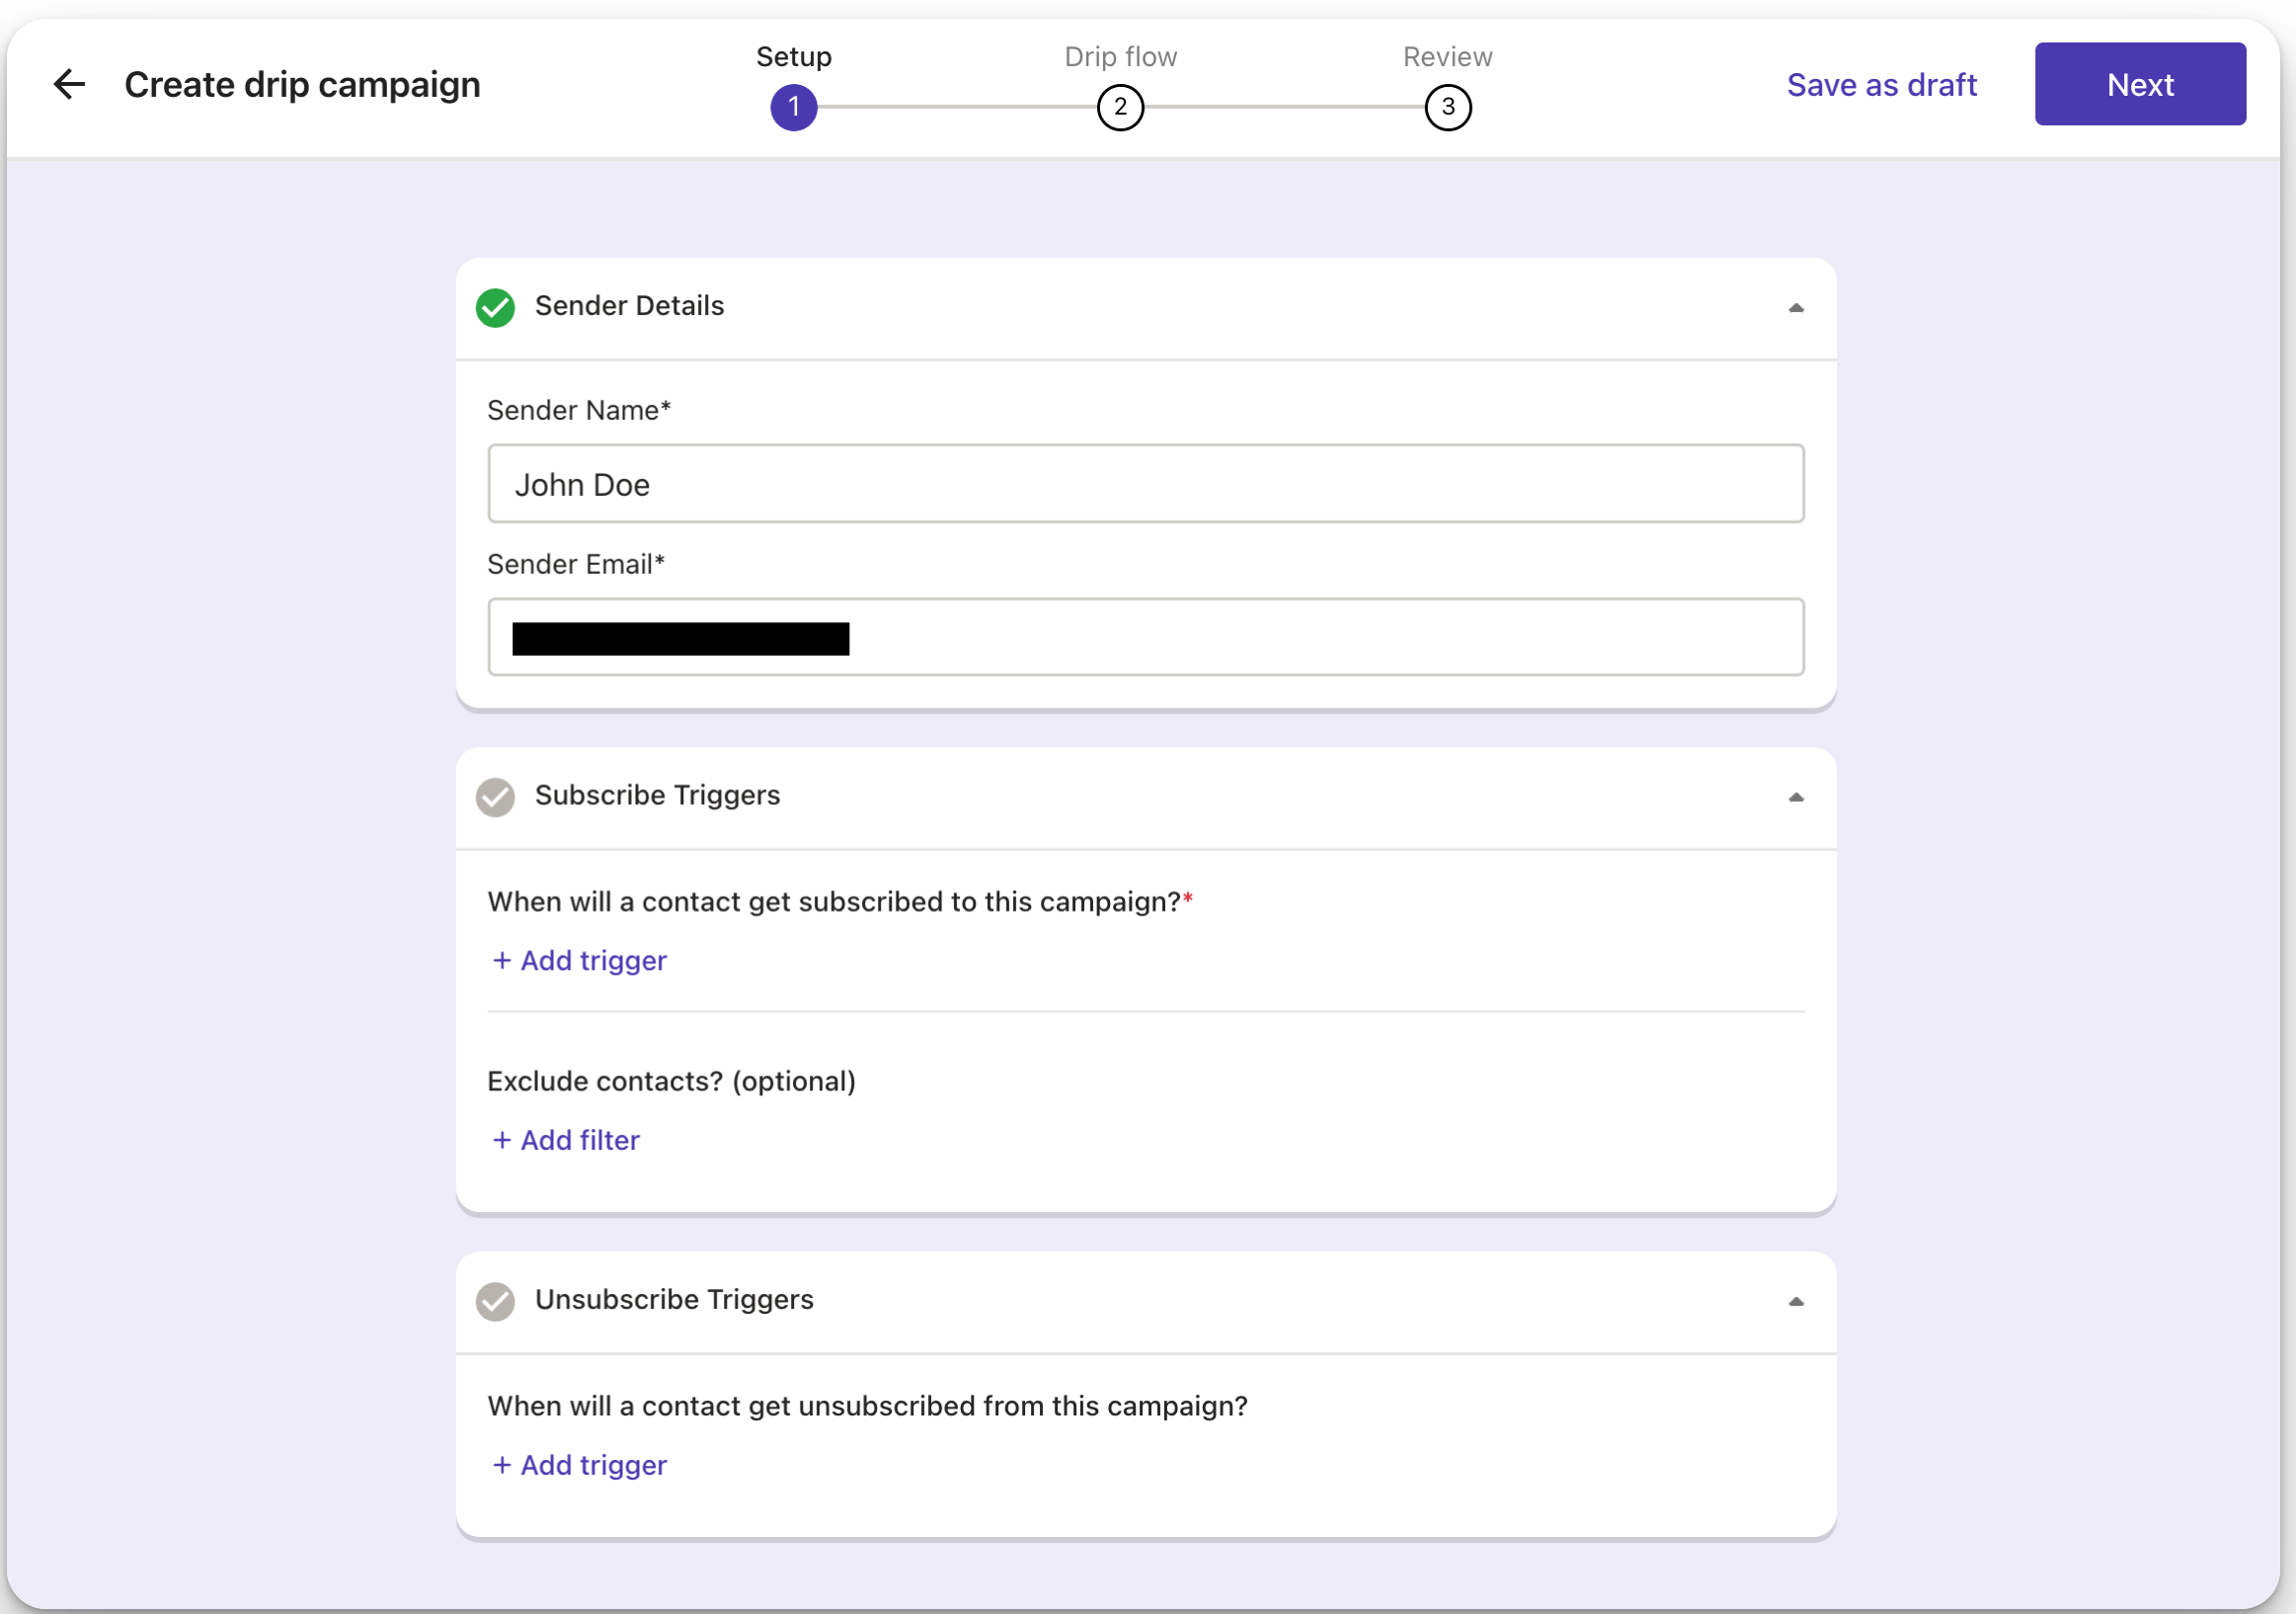
Setup for the Drip Campaign:
For creating a drip campaign you will have to add the sender’s details such as Sender’s Name and the Sender’s Email (the email from which the communications will be sent)
Next, add the Subscribe Trigger. Here you can add the condition for which the contact will get subscribed to this campaign. These triggers can be added on various conditions based on when the customer’s activity, intent of the customer, emails and even tags.
Even after a customer triggers the set Subscribe Condition, you can still choose to omit them from being part of the campaign based on triggers. This is an optional setting and you can choose to create your campaign without adding this condition.
The last trigger you can add is the unsubscribe trigger. This is a trigger for a contact to get unsubscribed from this campaign.
Create your Drip Flow:

Click on Add Email to add the first email on your drip. you’ll see 3 empty states that needs to be filled.
Email: Type the email that you wish to send. Add a subject and the body of the message. You can also choose to add a block for a discount code, limited time offer or a button.

Schedule For: Enter the duration in hours/days from when they are subscribed to the drip campaign.

Add Condition: Based on the action that the customer takes after receiving the email, you can subscribe or unsubscribe them from a drip campaign.
To add another email, you can click on Add Email and follow the same steps as mentioned above.
After you’ve added all the emails in the drip campaign, click on Next to review the information.
Review the information for the drip campaign
On this screen you can see all the details from the setup and drip flow. Make sure to review all the information to ensure the smooth functioning of the campaign.

If you want to edit information click on the respective icon for Setup or Drip Flow
Once everything is set, click on Publish to make your drip campaign live.
Step 4: This live campaign can now be visible in Active tab of Drip Campaigns.
Your drafts, paused and inactive campaigns can also be viewed in the respective tabs.

In the campaign’s tab, you get the overview of all the triggers set, emails in the flow and the number of total subscribers.
Once the emails start going, you can also view the:
Send: Total emails that have been sent
Open Rate: % of emails opened out of all the emails sent
Click Rate: % of people clicking the links mentioned in the email out of all the people who have opened the email
Unsubscribed: total people who have unsubscribed from the drip
On the campaign’s card, you can see 5 icon
Edit Icon: click on the first pen icon to edit the setup or flow of the campaign
View analytics per email: Click on the second icon to get the stats such as open rate, click rate and sends for each email present in the drip’s flow.

Pause Drip: Click on the third icon to pause the dip. While your drip is paused, no drip-related comms will be sent to your selected audience. Although on resuming, the drip will not resume from where you have paused it. It will still live through its timeline and continue as per the current time.
Duplicate Drip: The copy icon will let you duplicate the selected drip. This is helpful when you want to create a similar drip campaign and change only certain aspects of it.
End Drip: The last icon will make the drip inactive and stop all comms for it.
Was this article helpful?
That’s Great!
Thank you for your feedback
Sorry! We couldn't be helpful
Thank you for your feedback
Feedback sent
We appreciate your effort and will try to fix the article