The All Customers tool on Exly keeps track of all the customer data including customer name, contact details, the total amount spent by the customer, last transaction date, and more. Using this tool, you can directly send an email to all the customers at the same time. It also saves any filtered/unfiltered data in an Excel sheet format.
How to use the All Customers tool on Exly?
Follow this step-by-step guide to use the All Customers tool on Exly
Step 1: On the Creator Tool page, scroll to the Contacts menu, and click on All Customers.
Step 2: You can see details of all the customers such as Customer Name, Email, Phone Number, Total Spent, Number of Transactions, Last Transaction Date and more.

To manage the columns that are visible on this page click on Manage Columns on the top right side of the screen and select the columns as per your requirement.
The columns containing Email and Phone cannot be deselected.
Click on Save to make the changes. To go back to the original setting, you can also click on Reset to Default and the changes will be reversed.
You can reach out to any lead via Whatsapp by sending them a direct message. Simply click on the WhatsApp icon next to their contact details to take the required action.

Similarly, to email a lead, click on their email address and a screen will open. Fill in the details, write the email and click Send

Looking at their Response: If you have a form that the customers need to fill, you can view their responses in the Q/A Response columns. Click on See Response to view that customer’s answers in the form.

Filtering Customers: Filtering helps you sort out your customers on the basis of certain criteria and improve the way you reach out to them.
You can put a basic filter and search customers on the basis on Name, Email. Phone, UTM source, UTM medium and UTM campaign.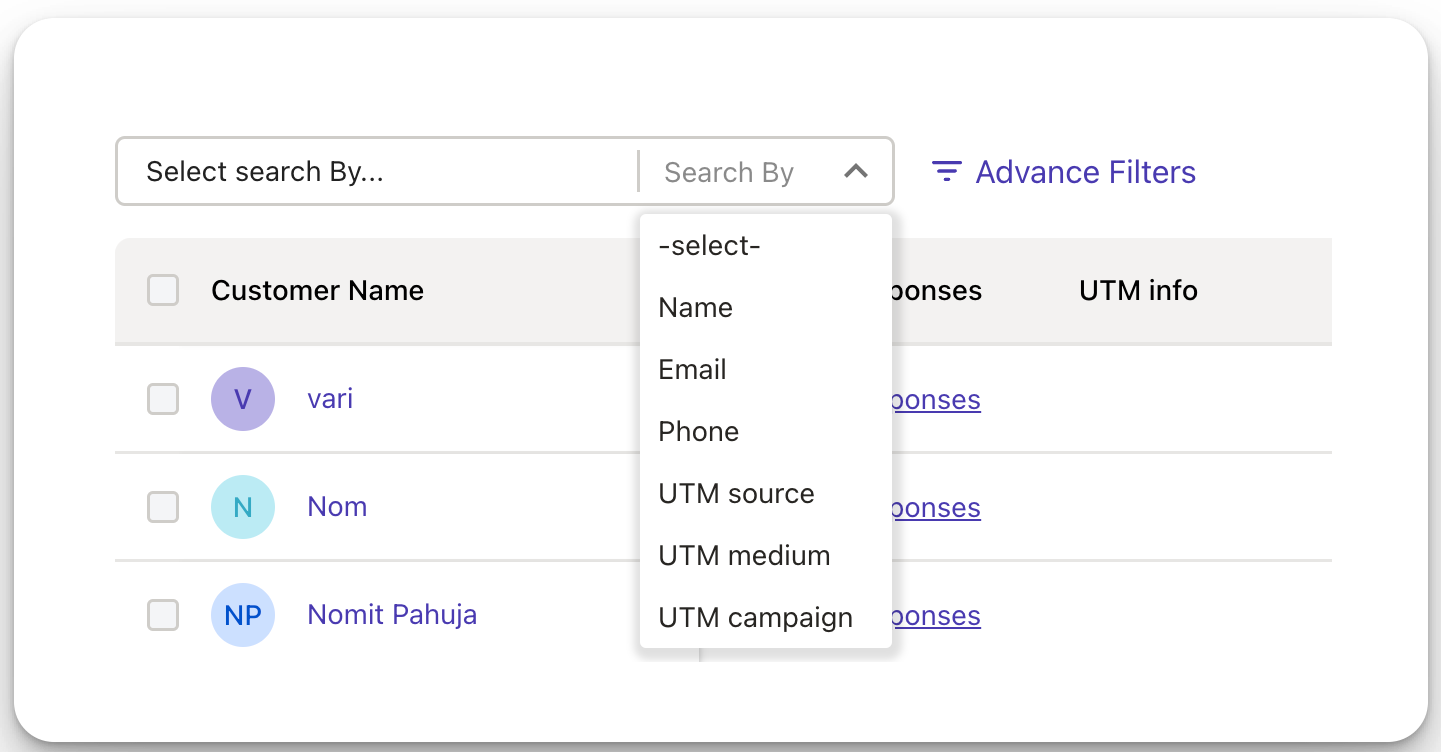
In this section, you can also apply advance filters and segregate customers on more than 1 criteria.
To do so click on Advance Filters and a pop up will open. Add the filters you want and click on Apply Filter.
To remove the filters, click on Advance Filters and click the red bin icon next to the filters.
You can even view the customers on an additional criteria - Loyal Customers, Most Loyal Customers, Need re-engagement and New Customers.
Loyal Customers tag is used for customers with the most bookings
Most Valuable Customers tag is used for customers who have spent the most money on your webpage
Need Re-Engagement tag is used for customers who haven’t made any transaction in the last 60 days
New Customers tag is used for the newest customers on your webpage

Creating Tags for Customers: Tagging customers is an easy and effective way to categorise them.
To add tag to any customer, click on the right most icon under the Actions columns

A window will open. You can either add a new tag or choose from an existing list of previously created tags. You can add more than 1 tag to any lead.
Adding Notes to Customers: When reaching out to customers there would always be points that you would want to remember.
Using these notes, you can easily communicate pointers with other members in the team.
To add a note, click on the first blue icon under the Actions column

In the pop up, add the note and click Save
You can perform actions like sending messages or assigning tags to customers in bulk too. Simply select the filtered customers and click on the desired action. Using this you can also select contacts across multiple pages and perform the desired action!
To view all details of a user, click on the user’s name from the Customer’s Name column. A screen will open. Here you can see customer’s activities, logs, tags added and the notes.
Check the activity of each customer by clicking on Activity. This will show the offering customer had bought along with details like offering’s activity along with the date.
You can add more notes for the customer from this window. Type the text in the space below and hit enter. The note will be added to the log of the customer.
To edit a note, click on the three dot menu and click Edit Note. Make the changes in the pop up and click Save. The changes should now be visible in the chat.

To delete a note, click on the three dot menu and select Delete Note. Remember, when you delete a note it is shown as a deleted note with the date of deletion next to it.

You can also add a tag to specific customers by typing the category on the right side under the Tags heading.
To delete a tag, click on the cross sign on the right side of the tag

From this same window, click on Details (next to Logs) to view all the details of the user.

To view the customer's responses, click on Responses (next to Details). Here you can check all responses from the Get In Touch button, Pre-Booking and Post booking forms.

Importing Customers:
You can choose the offering for which you want to import customers. This feature works only for Workshops, Regular Classes, Flexible Classes, Recorded Content, Quick Payment Pages, Whatsapp, Telegram and Branded Community.
Click on Import Customers icon on the top right of the screen.
From the window that opens, select the offering from which you want to import the customers.
After selecting the offering, you can not upload the .CSV file. Read the guidelines mentioned below to make sure that the .CSV file follows the right format.

Download the sample .csv file given and make sure that the file you import follows the guidelines provided.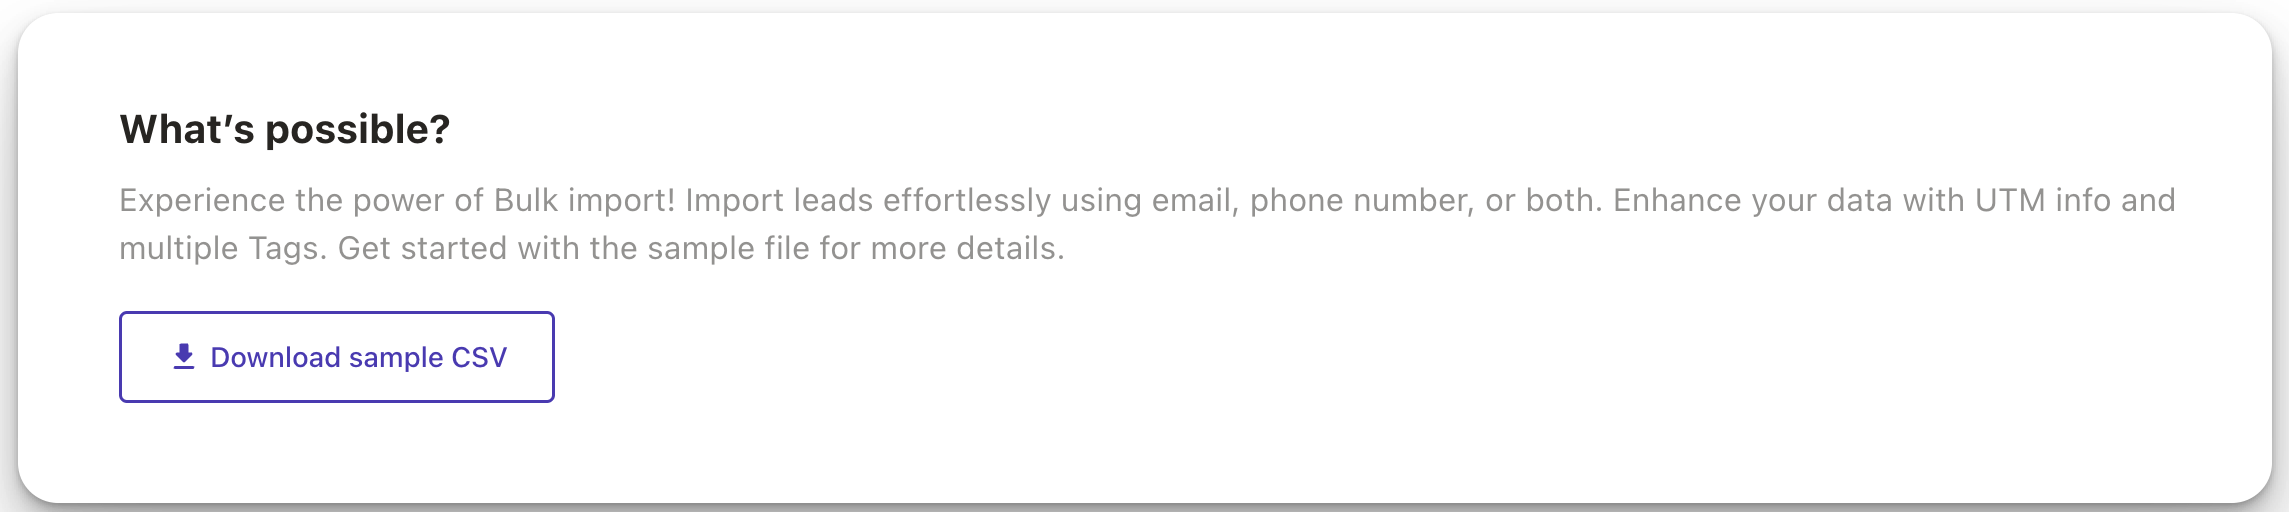
While making the file for bulk import remember:
You can upload contacts with either a phone number or email, or both. Exly won’t restrict the upload if there is at least one contact information. Please note that if you’re opting to upload only phone number, make sure you add the country code as well.
Columns shouldn’t have same names, and column names must not be left empty
There should not be any duplicate entries in the file. In case of duplicate entries, Exly will skip one of them.
To make the process simpler for you Exly uses intelligent column mapping to organise the content from your file.
We will recognise column headers in your CSV file and organise the data accordingly.
To make the import click on Select a .CSV file to upload and pick the file with the customers. Once the upload is done click on Continue to Import.

At last, you can also export the data by clicking on the Export Data button. This will download the details of all your customers in .CSV format.

Was this article helpful?
That’s Great!
Thank you for your feedback
Sorry! We couldn't be helpful
Thank you for your feedback
Feedback sent
We appreciate your effort and will try to fix the article