A certificate is an official document that signifies (or confirms) that a client/student has successfully completed a class/course or attended a workshop. It is shared with the enrollee after the completion of the session.
While creating a certificate on Exly is easy, sharing it with your clients (or enrollees) is easier. Simply click on the share button and voila, they will receive the certificate in their inbox.
Key Contents:
Official stamp or logo of the business
Name of the course or workshop
Date of completion/issue
Signature of the creator/instructor
How to create a certificate on Exly?
Before you start creating a certificate, make sure you have an offering (workshop, class, or a course) listed and published on your page.
A step-by-step guide on how to create a certificate on Exly:
Step 1: On the Creator Tool page, scroll down to the Workflow Tools menu on the left side and click on Certificates.
Step 2: Click on Create Certificate and a new screen will open up.

Step 3: Select the offering for which you want to offer a certificate for and them select a template.
Step 4: Click on Next and customize each certificate by adding information like the business logo, name of the course/class/workshop, date of issue, etc.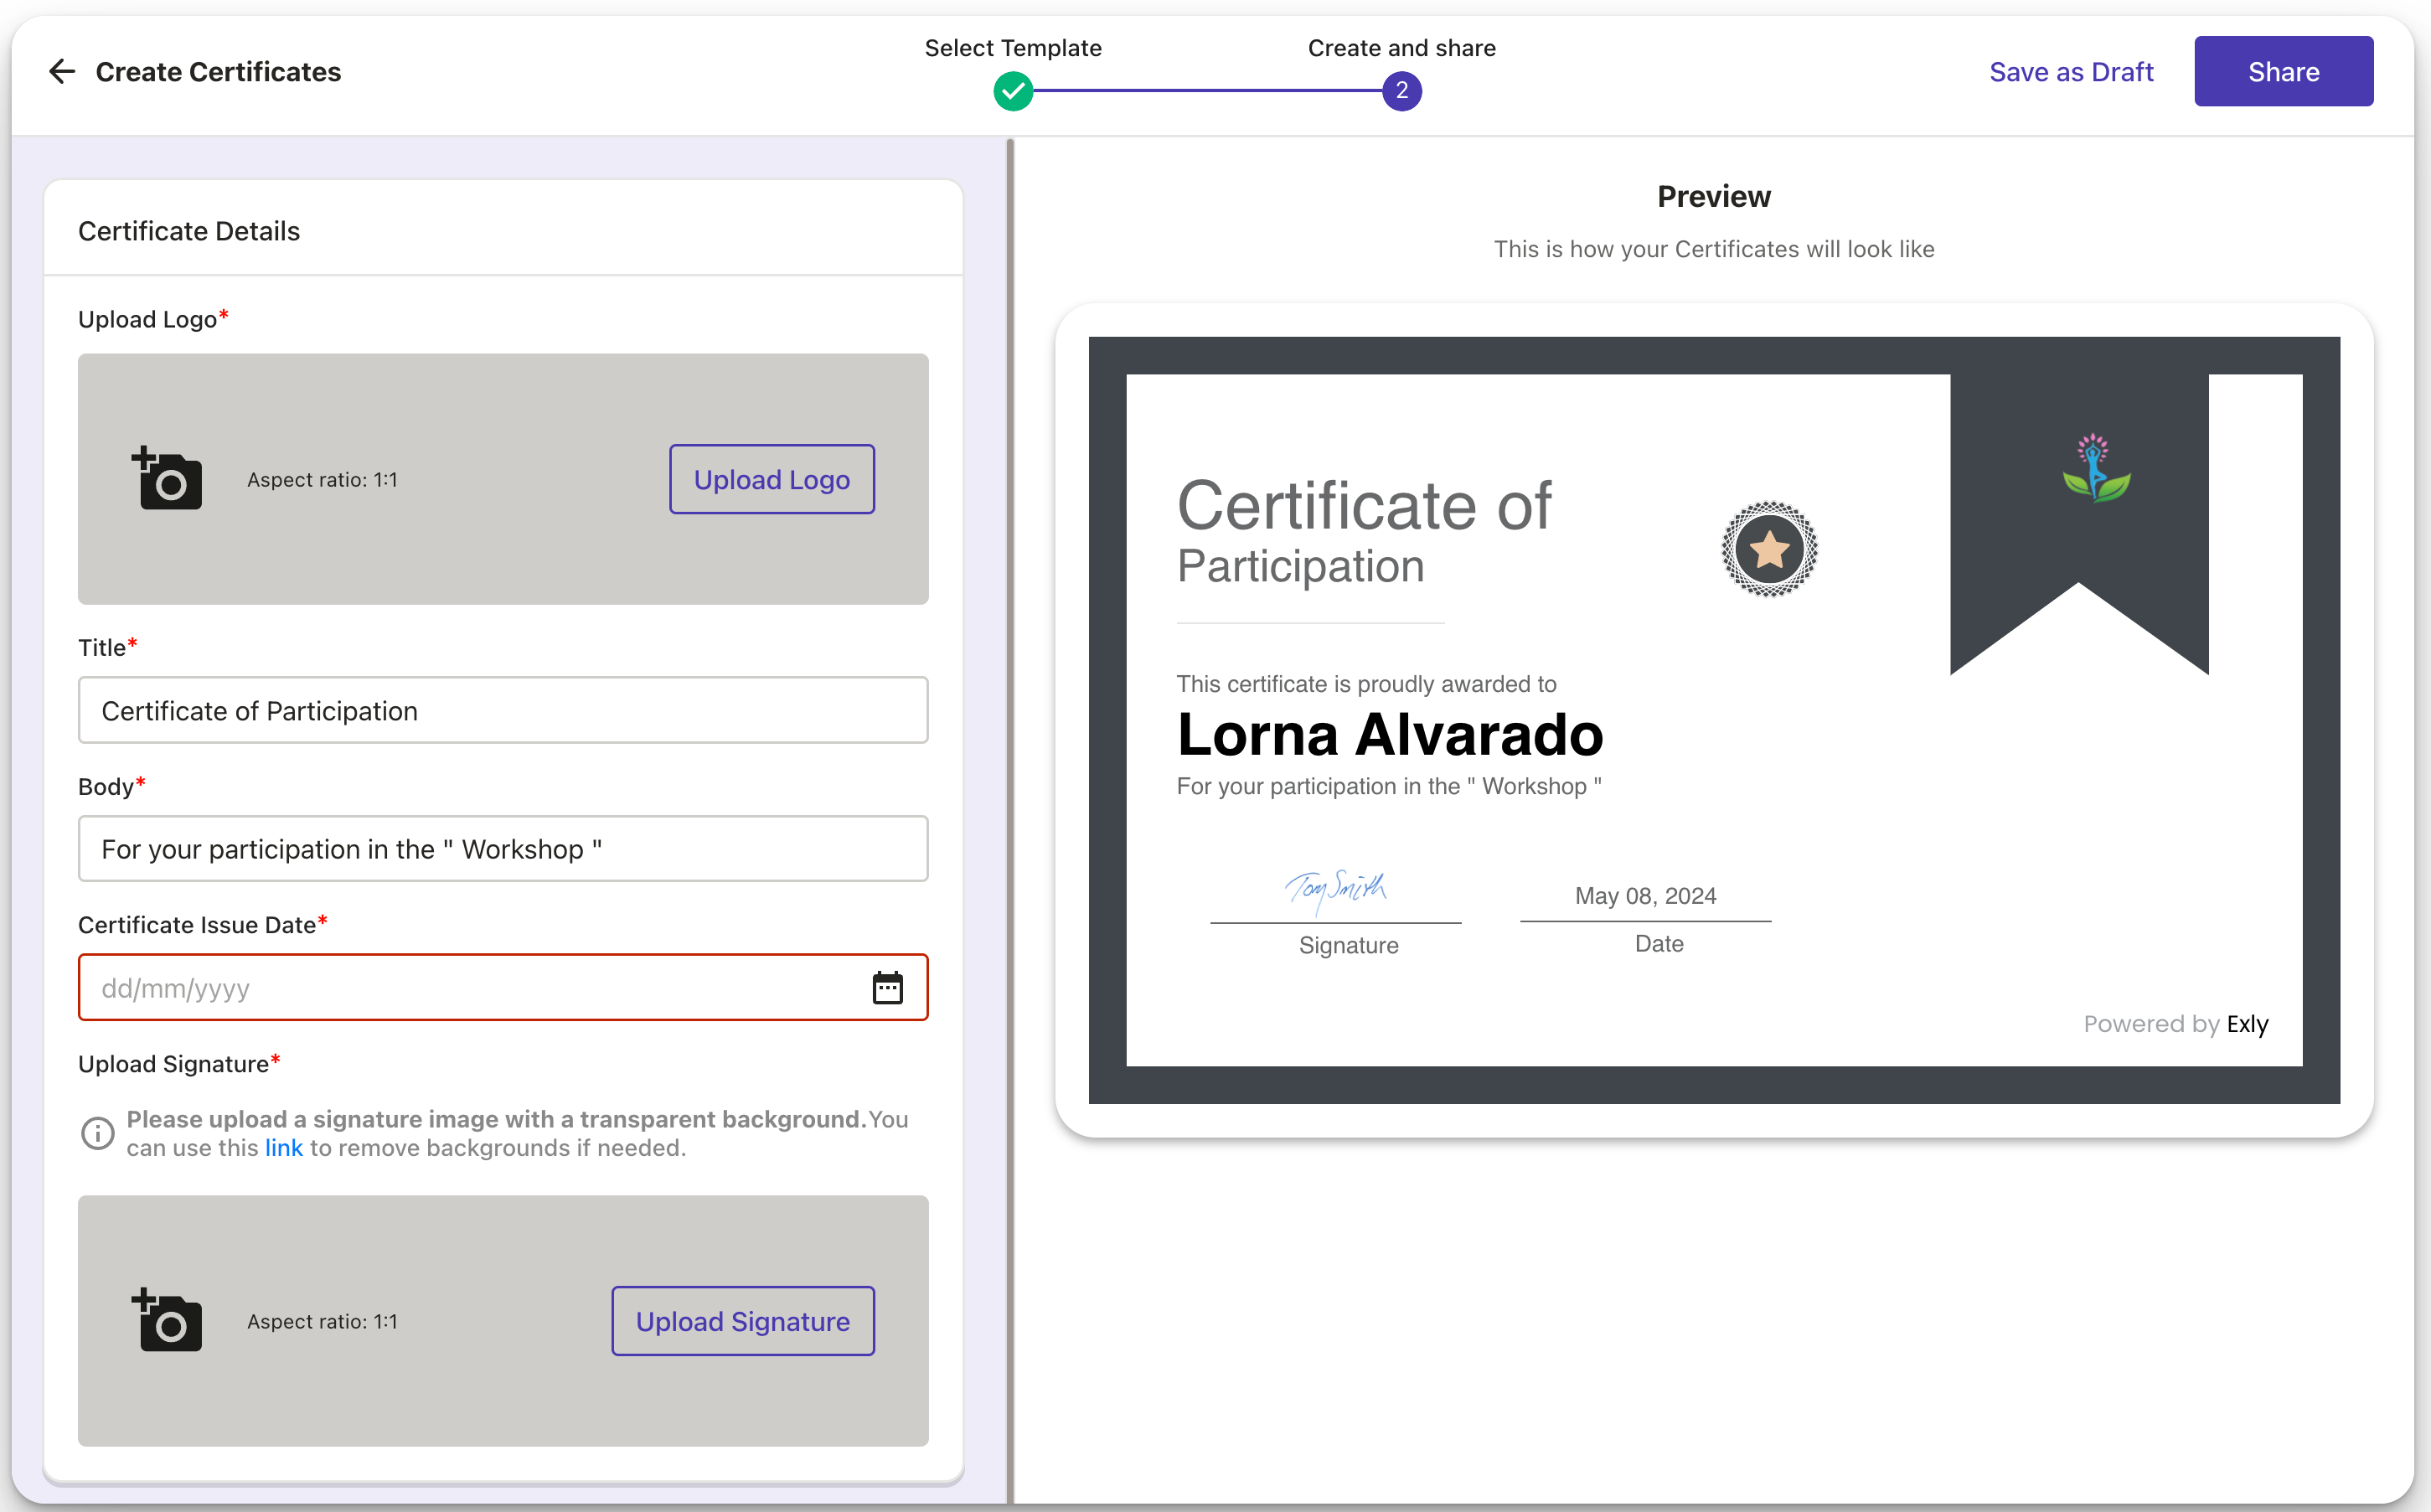
To add a logo, click on the camera icon and choose a file (PNG, SVG) to upload or you can look for a stock image using the search option.
Edit the Title and Body of the certificate along with the Certificate Issue Date.

At last, upload you signature. Make sure that the signature has no background. You can use this link to remove the background from your sign.
On the right side of the screen you can preview all the changes in real time.
You can save your progress in designing the certificate at any time by choosing the Save As Draft feature and get back to working on it at your convenience.
Once you are happy with the final look, you can either choose the Save As Draft option or Share the certificate right away.

Was this article helpful?
That’s Great!
Thank you for your feedback
Sorry! We couldn't be helpful
Thank you for your feedback
Feedback sent
We appreciate your effort and will try to fix the article