Setting up communication channels like WhatsApp broadcasts and email lists is crucial for businesses to stay connected with their audience and customers. These channels act as direct lines of communication, allowing you to share updates, promotions, and valuable content with your followers.
Just imagine being able to reach out to your entire customer base with a single click – it's like having your own personal broadcast system! Not only does it help you nurture relationships and keep your audience engaged, but it also opens up opportunities for upselling, cross-selling, and fostering a loyal community around your brand.
Plus, let's be real, who doesn't love a good deal delivered straight to their inbox?
For each offering you create on Exly, you can manage the communications you send to your customers.
Read this easy-to-follow guide on how to use the Manage Bookings tool on Exly in an efficient manner:
Step 1: On the Creator Tool page, scroll down to the Create/Edit Offering menu on the left side.
From the Live Offerings page, select the offering for which you want to create/view communications for.
Click on the three dot menu next to the Share button of the offering and select Manage Communications option.
Step 2: A new screen will open where you will be able to see all the Whatsapp broadcasts and emails sent to the customers who purchased this specific offering.

Types of Communicatiosn you can send:
For your ease of operations, we have created 3 categories for the communications (both emails and Whatsapp) that you can send. They can be a:
Confirmation: Emails that you send to confirm the customer’s purchase.
Reminder: Emailers that remind the customer to take a certain action such as - to join a webinar, take a course etc
Follow - Ups: Emailers that can help you get feedback and reviews from the customers. They are usually sent after the customer has bought your service.

Step 3: To send a message, click on Create Communication button from the top right of the screen.
From the window that pops up, select the type of communications that you want to it. It can either in an Email or a Whatsapp broadcast.

On the top of the page you can see the offering’s information along with the Sender’s name and Sender’s email

You can edit the information by clicking on the pen icon and making the changes.
Step 4: Add the remaining information such as the communication type, Session/Batchs and the communications time.
Remember, the option to add a Session/Batch only appears when you’re sending a communication to an offering with batches such as Regular Classes.
Each communication type has it’s own communication timing.
For Confirmation communication type, you can choose to send the message
N minutes after the registration
N hours after the registration
N days after the registration.
This is a good way to acknowledge the customer’s purchase of the offering.

For Reminder communication type, you can choose to send the message:
N hours before the session starts
N days before the session starts
N hours after the session starts
N Days after the session starts
These reminders are a good way to reminder the customer about any session before it starts or after it starts. It helps them plan for the event and clear their schedule for the same.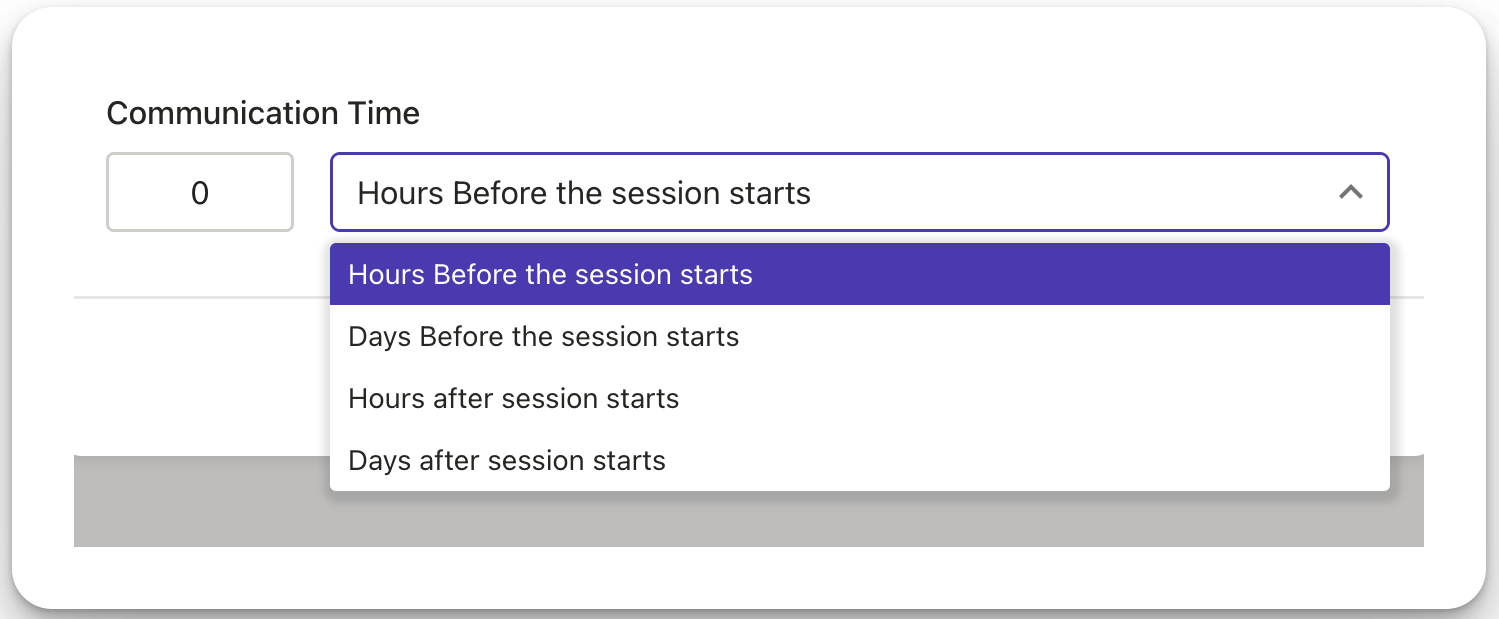
Lastly, for Follow-Up communication type, you can choose to send the message:
N hours before the session ends
N days before the session ends
N hours after the session ends
N Days after the session ends

Follow up messages are a great way to ask the customers for valuable feedbacks and reviews. You can use these review to under the customer’s point of view and make improvements in the future offerings. Moreover, the feedback you get can also be used to placed on the offering page to attract more people.
Click here to learn how to ask for feedback on Exly.
Step 5: Once you’ve filled all the required information, click on next.
For email messages, you’ll be redirected to the screen where you can create the email campaign you want to send.

For Whatsapp messages, you’ll redirected to the screen where you will have to create a Whatsapp broadcast.

Learn more about Creating Whatsapp Broadcasts on Exly in detail here.
Learn more about sending Email Campaigns on Exly in detail here.
Step 6: Before sending the communication remember that we have already configured some automated messages that get sent to your users like purchase confirmations & reminders. You can check those under 'Automated Messages' in 'Workflow Tools'. We recommend you to check those out and then configure these communications to avoid a clash between the two
Once you’ve configured the messaging and sent the communication, you’ll be able to see stats for them such as Sent, Read and Open Rate.

Once sent, you can not edit the communication, duplicate the communication and even the delete the communication using the three icons on the top left respectively.
Was this article helpful?
That’s Great!
Thank you for your feedback
Sorry! We couldn't be helpful
Thank you for your feedback
Feedback sent
We appreciate your effort and will try to fix the article