What is a thank you page?
To improve the customer’s experience, it is a screen that is shown after the customer has purchased an offering.
The post-payment thank you page is a crucial touchpoint that businesses should optimise to deliver an exceptional customer experience.
This page serves as a virtual handshake, acknowledging the customer's purchase and setting the tone for their journey ahead. By crafting a well-designed and informative thank you page, you create an opportunity to reinforce the value of the offering and foster a sense of excitement and anticipation.
Imagine the customer has just completed their purchase, and they're greeted with a warm, engaging message that not only expresses gratitude but also provides clear next steps and a glimpse of what's to come. This could include access to a member's area, a sneak peek of the content, or even an order bump.
Read this easy-to-follow guide on how to optimise your thank you page:
Step 1: On the Creator Tool page, scroll down to the Create/Edit Offering menu on the left side.
From the Live Offerings page, select the offering for which you want to create a thank you page.
Click on the three dot menu next to the Share button of the offering and select Manage Offering option.
From the screen that opens, select the Thank You Page & Upsells card.

Step 2: In the new window that opens, you’ll see 2 options. Thank you page (for purchases) and Thank you page (for opt-ins).
Thank you page (for purchases) are shown when the customer has purchased an offering that is live.
Thank you page (for opt-ins) are shown the the customer signups up to be in the waitlist of that offering.

Step 3: Let’s first Optimise the Thank you page (for purchases).
Click on Customise on the Thank you page (for purchases) card to open the editor.
Step 4: On the editor page on the left side you’ll see 4 sections :
Confirmation Section: Here you can edit the main title of the thank you page that will show on the top along with the description.
All the changes that you make will be shown in real time in the preview screen on the right.
Click Save after making the changes and move to the next section.
Redirection: Here you can choose the next step for your customer by redirecting them to some other screen. By default, there is no redirection, the user would have to either exit the screen or click on ‘Continue’.
You can change this default redirection and choose from 3 options:
Redirect to Whatsapp: Opting which the customer will be able to message you on the number provided.

Redirect to Telegram: Opting which the customer will be redirect to the given telegram group/channel
Redirect to Custom Link: Add a custom link that the customer will be redirected to - it can be the link to a web page, offering page or any other link

These redirections will occur only when the customer clicks on the button. If you want the user to be automatically redirect check the Enable Automatic Redirection box. Post enabling this, the customer will be redirected 5 seconds after they reach the Thank You page
Click Save to make the changes and move to the next section.
Upsell Section: You can choose to upsell and offering and edit how it will look on the thank you page. In this section you can
Change the offer price for the offering you’re upselling
Edit the title, subtitle and description in the upsell section
Add a media in the form of an image (.jpg or .jpeg format) or video (in .mp4 format)
Update the offer text shown in the banner.
At last you can change the purchase button text and cancel button text
You can view all the changes in real time in the preview screen.
At last, you can add testimonials too. You can change the heading of this section and choose the list design to be a vertical list or a horizontal list.

Click on Add a Testimonial and fill the form that opens. The testimonial can be in the form of a text, image of video.
Click Save after adding the testimonial.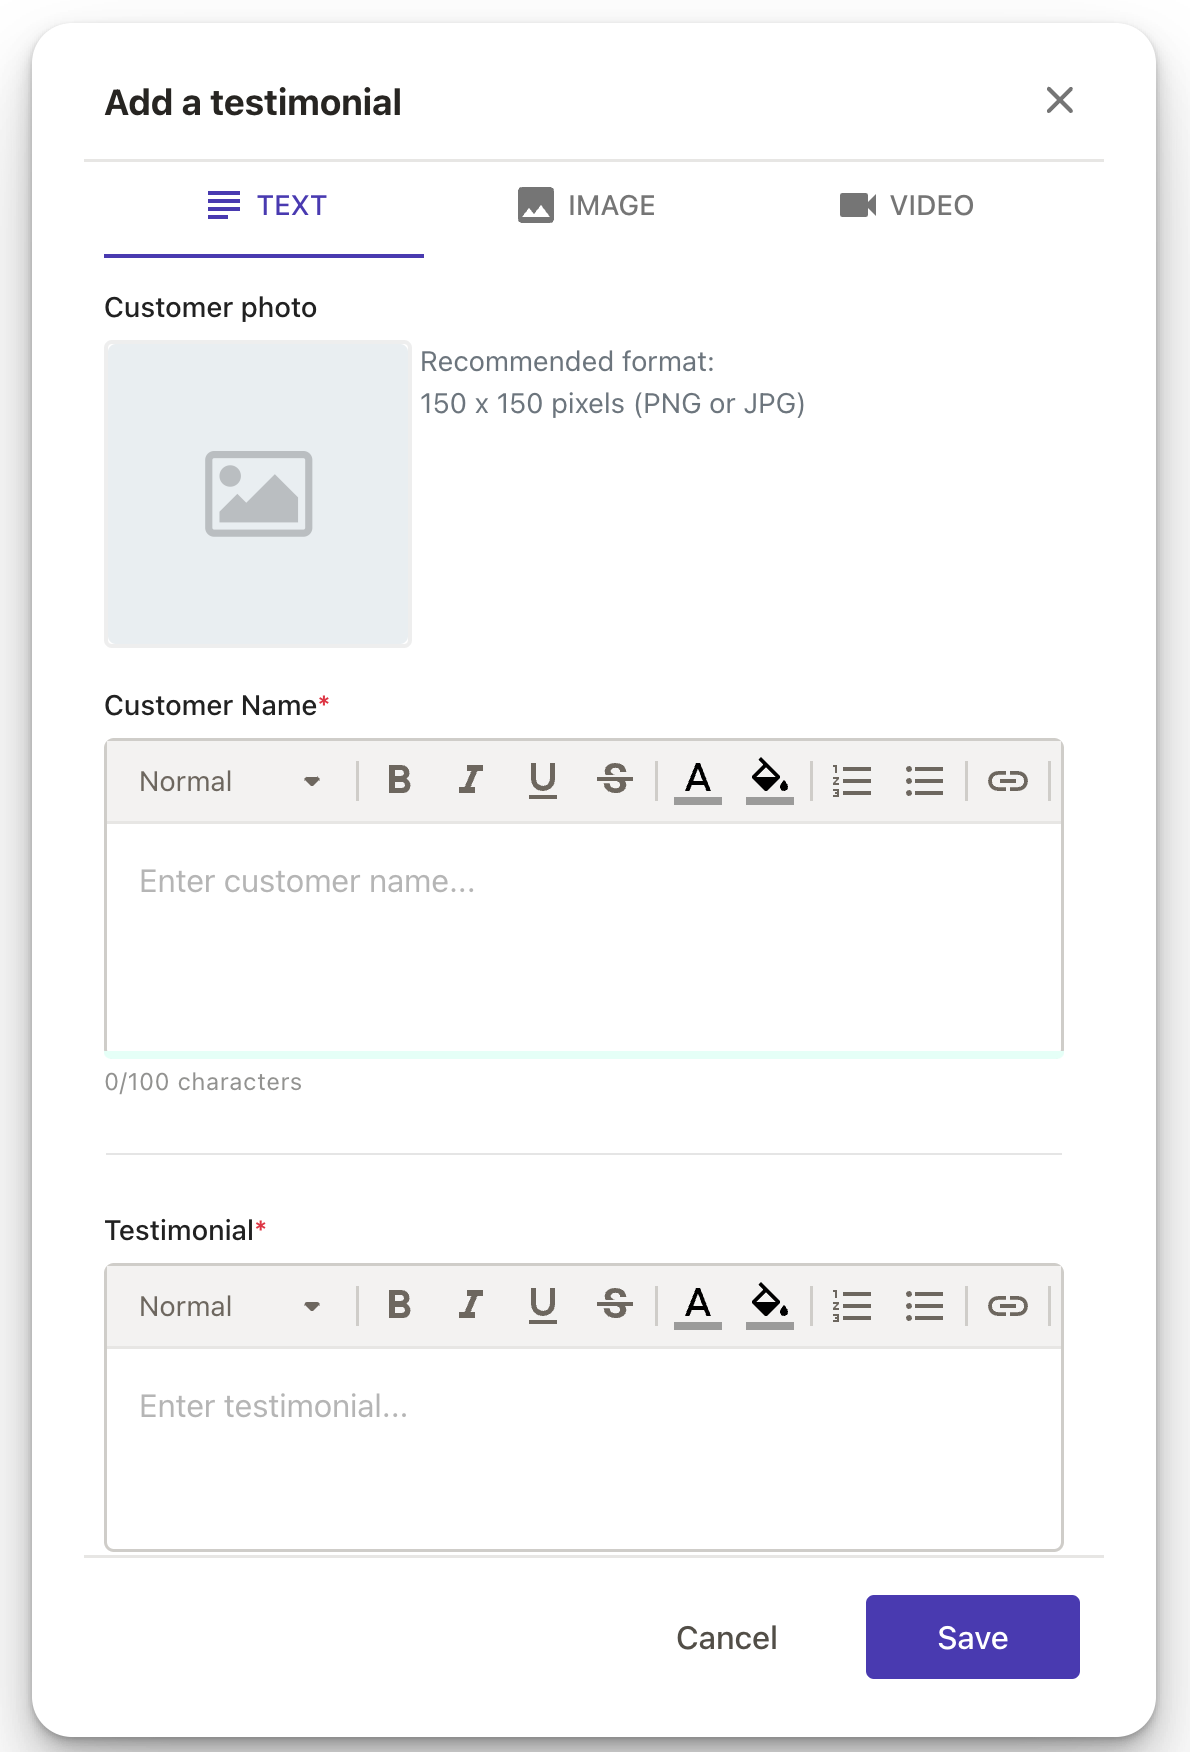
Once you’ve updated the said sections, click Update the the new Thank You page will be live immediately.
Similarly, you can customise Thank you page (for Opt Ins) card to open the editor.
On the editor page on the left side you’ll see 3 sections - Confirmation, Redirection and Testimonial. Filling in these sections is similar to filling in the sections mentioned above.

After editing the sections, click on Update and your new Thank You page for inviting people to a waitlist is ready.
Was this article helpful?
That’s Great!
Thank you for your feedback
Sorry! We couldn't be helpful
Thank you for your feedback
Feedback sent
We appreciate your effort and will try to fix the article