A blog post is any informational article, news piece, or instructional guide that is published in the blog section of your webpage. It’s usually an educational and informational piece of writing that focuses on a specific topic or query and is often supported by other media like images, video links, etc.
Creating a blog post on your Exly webpage can help you and your business with the following:
Boost Search Engine Optimization (SEO)
Generate more leads and help increase the business
Develop better relationships with existing and potential customers
Generate awareness about your brand, your USP, core values, and products/services
How to create and edit Blog Posts with Exly?
You can Create/Edit Blog Posts with utmost ease on Exly by following this easy-to-follow guide:
Step 1: On the Creator Tool page, scroll down to the Workflow Tools menu on the left side, and click on Blog.
Step 2: From the screen that opens click on the Create Blog Post button.

Step 3: You will be redirected to a new page, start off by adding a cover photo. The aim is to upload an image that works well with the content of your blog, something that complements the text. Click on the camera icon to either a picture from your device or search for a stock image
Step 4: Now add the title of the blog and the blog copy in the space below the title box. You can change the formatting of the text by using the options of your choice - font, font size, bullet points, bold, underlined, and more. .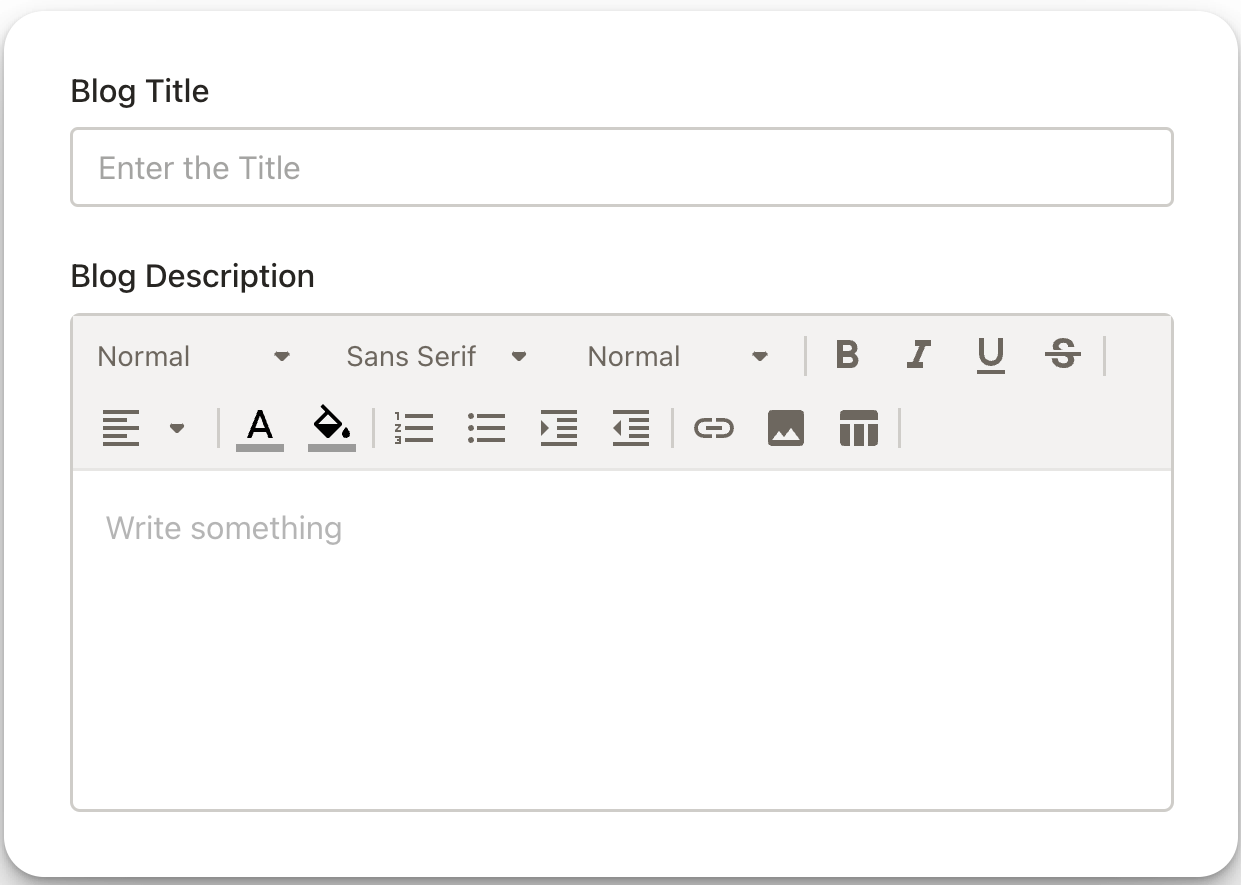
Step 5: You can also add images and video links to your blog post using the classic copy-paste method.
Step 6: Once you have added all the information, media, and hyperlinks, click on the Preview option to see how your blog post would appear on the webpage for your customers on both web and mobile view.

You can either choose the Save As Draft option and publish the blog post later or click on the Publish Blog button to make the post live right away.
Step 7: When you click on the Publish Blog button, a new pop-up will appear on your screen. Select when and how the end-users can read this blog post.

When you only check the Set it live now box, you can simply go ahead and click on the Publish On Website Now button to complete the process. However, you can also choose to send the new blog post as a newsletter via email to select email ids.
You can decide to publish the blog post later as well, just check the Schedule it for later box, and select the date and time. Click on the Schedule button to complete the process. However, you can also choose to share the new blog post as a newsletter via email to select email ids once the article is published on the webpage.
As soon as you publish your first blog post, a blog section will be automatically created on your website.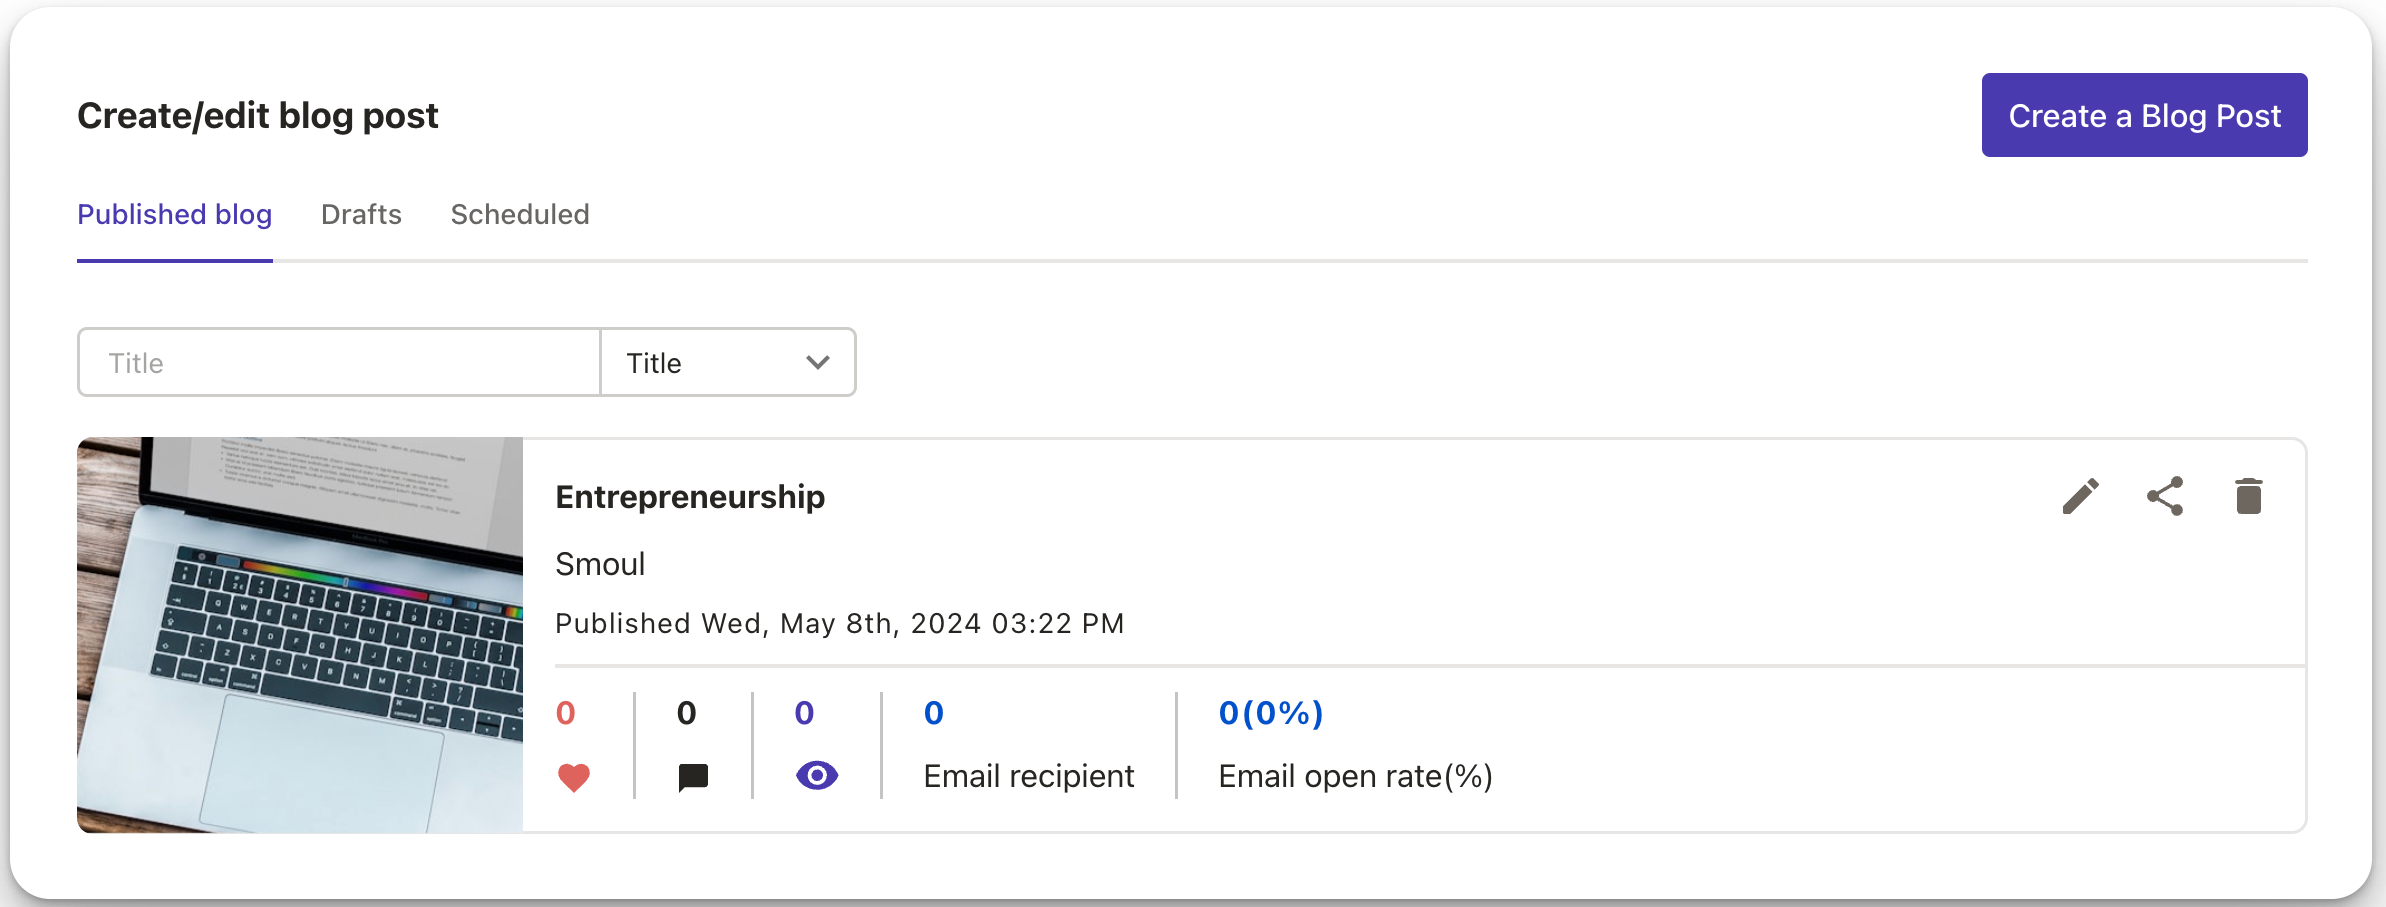
You can even share a published blog post directly on social media like Facebook, WhatsApp, or on any other platform of your choice by copying the link.
You will have complete visibility of the engagement activity - how many people have liked the blog post, commented on it, viewed it, the number of email recipients, and the percentage and count of opened emails.
Every time a user wants to like or comment on your published post, they will have to add their username and email address, and then click on the Join button to complete the action.

Step 8: On the main screen, you can view all the published blogs, blogs currently in draft and scheduled blogs separately by clicking each tab.

You can also filter the blogs and search for them by adding the title name
Was this article helpful?
That’s Great!
Thank you for your feedback
Sorry! We couldn't be helpful
Thank you for your feedback
Feedback sent
We appreciate your effort and will try to fix the article